Showing posts with label dresses. Show all posts

Sunday, June 30, 2013

Sundress Series-Pintuck Ruffled Maxi Dress

I am so proud and excited to be a part of Melly Sews Sundress Series.


30 days of sundresses and there were SO MANY fantastic ideas this year I can't believe I am included in this amazing group of women.

I had so many ideas flowing when I first received the invitation. I wasn't sure which way I wanted to go. Remember last year?  My tied in a bow maxi for my expecting days. Was that only last summer? WOW it feels like so long ago.


Keeping with tradition I choose to share another maxi dress this year, but this time it is for my little Lizzy bug. I actually based my dress off of Violette Field Threads ginger dress pattern. Who doesn't love a pattern remix? I love their patterns and the ginger top/dress is one of my favorites. But of course, I added my own little twist just to make it one of a kind. Elizabeth is in love with long dresses so this was an easy choice.

I actually found the fabric for the dress in my mother-in-laws fabric stash. A good size piece in fact. (Sorry I don't have the exact measurements of the piece.) I started with the skirt portion. My daughter is 38" tall. You will have to adjust to fit your model. My skirt pieces were 36" long and 29" wide. (2 pieces). I laid the pieces out on a flat surface and started the pintuck pleats. 7 inches from the top I created 6 pleats each measuring 2" wide.
The best way I have found is to measure, pin in place, iron down, flip the flap up, sew along the ironed line, flip the flap back down and press flat.  
Repeat for all 6 pleats on the front and 6 more for the back.
Then I created the top. I followed the instructions except I added a placket to the front with ric rac peaking out the sides. Fold a piece of fabric in half measuring 4 inches wide and the length of your top piece. With RST sew the placket together. Then flip right side out and iron flat with seam on the middle backside.
 Place the placket in the center of the top. Adjust your ric rac to the outsides.
 Pin well. Topstitch along the placket making sure to catch the ric rac.
 Add the buttons.
The placket is stitched to the front of the top before I added the lining piece. I also added ric rac to the collar pieces.

I followed the instructions for the remainder of the dress, just make sure to match up your pleats for the front and back of the skirt so that they are even all around the dress. The only other adjustment I made was adding length to the straps. I made the straps 2x as long for a nice full bow in the back.

This dress turned out better than I had hoped for. I love the pleats, it gives the dress a lot more body and flow. And the print and colors are perfect for a season of teals, turquoise, and mint. Of course little Lizzy loves her new LONG DRESS too. I can't stop her from twirling in it.


Thanks again to Melissa from Melly Sews and all the other Sundress contributors. I sure have added a lot of sundresses on my to make list.

Monday, March 25, 2013

Finished-Mockingjay Dress

I am so proud to announce that I finished my dress!!!! Remember from the fabric search giveaway? Seriously so excited about it. I love how it turned out. I fits so perfectly I wore it all day and was comfortable and confident.
 
My brother-in-law asked if it was my Hunger Games dress and I realized it kinda does look like the mockingjay so I am going with that as the name. When I put it on at first I was worried. I kept thinking of that part in "The Help" when she asks if her dress looks homemade. But my husband, (the loving and supportive husband that he is, and smart did I say that already?) assured me it did not look homemade. And he was right, no body guessed that I had made it. This gave me an extra confidence boost.


 For this dress I chose the tab feature but added a back bow just for fun.
 
Once I started it was so simple I am already planning on another one with a few alterations. I love how it synches at the waist. And it has pockets for all my little knick knacks. Now I am totally inspired to sew more for myself, I went out and bought 5 new patterns (3 dress patterns and 2 tops). There will be a lot more adult sewing this year!

Wednesday, March 20, 2013

Spring Bloom Dress

I love using Pinterest as a medium for new ideas. Sometimes I will see something and think..I can make something like that. My most recent pin was this adorable dress, perfect for spring.
 
I love the plain color but I really wanted it to be a little more whimsical and fun. So I let my daughter pick her fabric (she choose pink naturally) and I got to work.
Instructions:

for a 3T you will need 1 yard of fabric, 1/2 yard of contrast for the ruffles, 3 buttons (or buttons to cover), matching thread

1. Start with a basic bodice pattern using a well fitted t-shirt. For more information on this check out THIS post. Using your basic bodice (make sure you have a front and a back, the back neck should be slightly higher than the front) draw a diagonal line starting about 1 inch from the inside of the shoulder. The back piece needs to be 1 1/2 inches wider of the center line for the overlap of the buttons.


2. Cut all your pieces:
       -2 front pieces on the fold (1 front, 1 lining)
       -8 side panel pieces
       -4 back pieces
       -Skirt piece: 2 rectangles measuring 15" long and 44 " wide (my dress was really poofy so if  you want a slimmer look you can make your skirt panels shorter in the width.)
       -2 strips of contrast fabric: 2"x 44"
       -2 strips of contrast fabric: 2.5"x44"

3. Pin the front bodice piece to the back bodice pieces at the shoulders with RST. Sew together. Repeat with lining pieces. Press seams open.
 
4. Match the side panels together at the shoulders. Stitch together with RST.  Press seams open.

5. Using your strips fold over 1/4", press, fold another 1/4", press. Top stitch in place. This creates a nice hem. Repeat with all the strips. On the other side sew a gather stitch along the top length keeping the ends of the thread long for pulling. Gather to make ruffles matching it to the side panel. Press the ruffles flat.
5. Lay the pieces down in the following order:
    -Bodice top right side up
    -2" strip right side down
    -2.5" strip right side down
    -side panel right side down matching shoulder seams with bodice top.
Pin all 4 pieces together (I used a lot of pins). Stitch together using a 1/2" seam. Press open so ruffles face up and out.
6. Stitch lining pieces together the same as the top pieces omitting the ruffles.
7. With RST pin top piece to the lining. Stitch around the neck and arm holes. Flip the bodice right side out and sew the sides together.
8.Turn the bodice over and mark your button holes. Use your machine to make the button holes in the back. Add your buttons.

9. With RST pin the skirt panels along the sides and stitch together. This makes a large tube. Along the top sew a gather stitch. Gather the skirt tube until it is the same size as the bodice top. With RST pin the skirt top the the bottom of the bodice. Sew in place using a 1/2" seam.
10. Turn dress right side out. Finish the hem by folding under 1/4", press, fold 1/4", press. Top stitch in place.


***If I could do this again I would make the ruffles wider and I would sew them about 1/2" from the neckline instead of an inch. I would also make my skirt less full (but my daughter wanted it nice and full for twirling. You gotta love little girls and their twirling.)


Monday, March 4, 2013

Emmaline Dress Review

I was looking through my dress patterns the other day trying to find a fun spring dress to make for my daughter, when she decided to come in and search with me. There are so many patterns that I have purchased with the intent of making but never get around to it. So while searching through the online patterns I came across the Emmaline Dress from Violette Field Threads and Elizabeth instantly wanted me to make her one. She loved the fact that it is long. Very different from anything I have made her before.

So I decided to make a girl day of it and gave her total creative license. We went to the fabric store and she picked the fabric, she picked the pattern, and she even helped me with the sewing a bit. She is only 3 so I know actually sewing with her is at least 5 years off but it was fun to have her play with her little ironing board and talk while I made the dress.

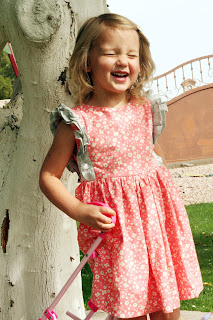
It turned out FANTASTIC! So adorable. I love the length and the lightness of the dress. It is a very light coral colored cotton with white polka dots and inside the polka dots are orange polka dots. My only complaint is that that neckline is a little low. I feel more comfortable with a plain white tee under it just to make sure there isn't too much skin showing. I am sure I will be making it again. She has worn it every day since I made it (she is in a stage where she tries on several dresses throughout the day.)