
 Basic ruffled panel top.
 Same shirt design as above and same sleeves but with a flower instead of the ruffle.
Here is your supply list again:
-tissue paper or drawing paper for the pattern
-1 yard of main fabric
-1/2 yard of contrast fabric for the sleeves, bottom panel, and bias tape (if you want the sleeves the same as the main you will have enough with just 1 yard. You can also use store bought bias tape).
-4x24 inch strip for the ruffle panel or flower
-a button for the back closure
-skinny elastic for the back closure and sleeves
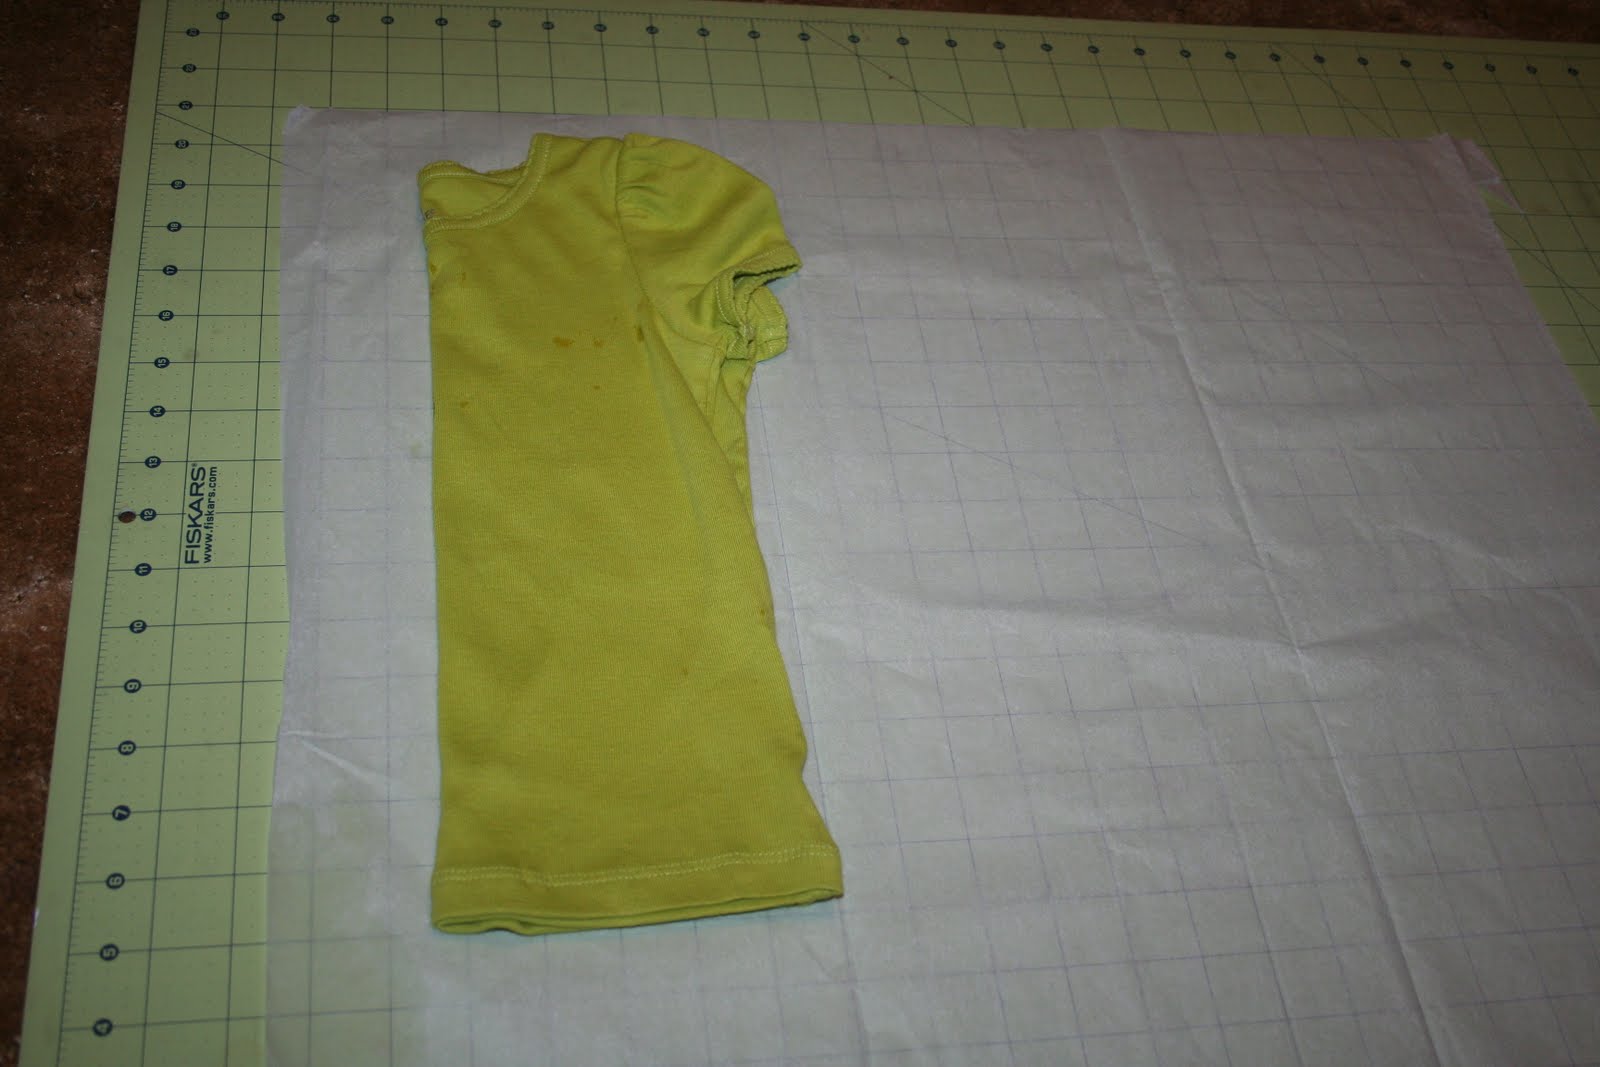
STEP 1:
You need a regular t-shirt that fits your model. It is better to get one that is a little big. Then you are going to trace the outline of the t-shirt onto tissue paper or drawing paper. Trace the shirt with 1/4 inch on each side for the seems and I like to make it a little more A line than straight. I also add about 2 inches to the bottom because I want it to be a tunic style. (You can always hem it up at the end). Trace the front part around the armhole and then the sleeve.


I made the sleeve a little longer because I want it to be ruffled at the end rather than the cap sleeve the t-shirt has. Sleeves are the toughest part for me. If you find later that your sleeve doesn't fit not worries you can always alter it or cut another one.


Here are your two sleeves, the front, and the back.
STEP 3: Now you need to make your trimmings.
For either option you will need:
Bias Tape-enough to go around the neck (I made my own and cut it 2"x16" I like extra in case I want it for the sleeves.)
Back panel for the button closure 3"x6" piece
****Bottom hem approximately 4"x29" (this is based on the size shirt you are making. Measure the bottom of the top for a more accurate measurement. Make sure to include the front and the back). optional
For the ruffle front:
A panel measuring 4"x 24" (again measure the front of your shirt and times it by 2)

For the flower:
Bias cut 3"x64" (not sure how much you will actually need depending on the size of flower you want but this is a base)

 How do you know what a bias cut is? Cutting on the bias is simple. Fold your fabric into a triangle instead of a square. The bias is the stretchy part of the fabric. Most of the time you cut on the grain.
Here is all the pieces for both the shirts.
Please let me know if you have any questions or issues. Tomorrow we will but in the panel or the flower.
You need a regular t-shirt that fits your model. It is better to get one that is a little big. Then you are going to trace the outline of the t-shirt onto tissue paper or drawing paper. Trace the shirt with 1/4 inch on each side for the seems and I like to make it a little more A line than straight. I also add about 2 inches to the bottom because I want it to be a tunic style. (You can always hem it up at the end). Trace the front part around the armhole and then the sleeve.


I made the sleeve a little longer because I want it to be ruffled at the end rather than the cap sleeve the t-shirt has. Sleeves are the toughest part for me. If you find later that your sleeve doesn't fit not worries you can always alter it or cut another one.


STEP 2: Next you are going to cut your fabric. I said you needed 1 yard. You really will only use about 1/2 a yard but I like to be safe and get more in case I mess up. Making your own pattern can be tricky at first but the more you do it the better you get. You will need to cut 2 pieces (1 for the front and 1 for the back) on the fold. The front piece should have a lower neck than the back.  Then you need to cut 2 pieces for the sleeves on the fold. You can cut this from your main fabric or the contrast fabric.
 Then you need to cut 2 pieces for the sleeves on the fold. You can cut this from your main fabric or the contrast fabric.

Here are your two sleeves, the front, and the back.
STEP 3: Now you need to make your trimmings.
For either option you will need:
Bias Tape-enough to go around the neck (I made my own and cut it 2"x16" I like extra in case I want it for the sleeves.)
Back panel for the button closure 3"x6" piece
****Bottom hem approximately 4"x29" (this is based on the size shirt you are making. Measure the bottom of the top for a more accurate measurement. Make sure to include the front and the back). optional
For the ruffle front:
A panel measuring 4"x 24" (again measure the front of your shirt and times it by 2)

For the flower:
Bias cut 3"x64" (not sure how much you will actually need depending on the size of flower you want but this is a base)

 How do you know what a bias cut is? Cutting on the bias is simple. Fold your fabric into a triangle instead of a square. The bias is the stretchy part of the fabric. Most of the time you cut on the grain.
Here is all the pieces for both the shirts.

Please let me know if you have any questions or issues. Tomorrow we will but in the panel or the flower.
3 comments:
I saw this on Sew Much Ado, I love the ruffled panel
This is a great project - thanks for linking to www.thestuffofsuccess.com
So cute! Love the touch of ruffles. Thanks for linking up to Share the Love Wednesday!
Mary
Post a Comment