I started with a basic a-line shape (a little wider than usual) and cut it into three sections. Then I cut the fabrics using those 3 sections. I sewed each section together to make the block effect.
Then I sewed the front and back of the dress together at the shoulders.
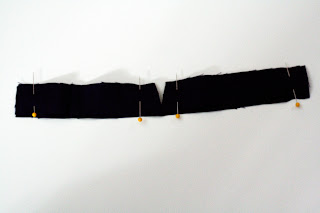
Next I created two sleeves and cut the cuffs. You will need 4 cuff pieces (2/sleeve) about 2 inches in width. Find the center of the cuff and cut a small triangle through all the pieces. With RST sew along the bottom where you cut out the triangle. Repeat with other cuff.
Flip the cuff right side out and press with the iron. Then top stitch along the same line.
With RST match up the raw edges of the cuff and the sleeve. Sew together, open and press, and top stitch along the seam to keep the cuff flat. Repeat with other sleeve.
Attach the sleeves to the arms of the dress and sew up the sides.
With the dress inside out mark on the front of the dress about 2 inches from each side seam and 2 inches from the top of the pink block. These marks are for your elastic. Using a zig zag stitch the elastic all around the backside of the dress starting at one mark and finishing at the other mark. Make sure to pull your elastic tight and try not to stitch directly on the elastic. I used 1/8th size.
Fold your dress in half at the neckline and cut a keyhole shape in the back of the dress.
Using your prepared piping pin and sew the piping around the keyhole RST. Flip the edge of the piping underneath the dress and top stitch it in place.
Attach your elastic in a loop shape to the top of the dress. Then finish off your neckline with the piping RST. Again flip, tuck the ends under, and top stitch along the neck line to hold the piping in place.
Sew your button on.
Turn the bottom of your dress under 1/4th an inch, press, then another 1/4th inch and press. Top stitch the hemline.
Create a bow from the leftover bias tape used for the piping and hand sew it onto the front of the dress.
(I know this isn't the most complete tutorial but I was kind of figuring out the piping as I went. Please let me know if you have any questions, I would be happy to explain more.)
It is a simple dress but I love the details that make it special.


3 comments:
I always love your creations Jess - this dress is adorable!
That is the perfect little spring out fit, with sleeves long enough still to be warm on chilly days, and that pop of color makes it really bright and cheery.
Great Job Momma!
with love,
Jo
The details of the pops of color really make this dress! Well done!
Post a Comment