Tuesday, August 30, 2011

Chair Redo-Wowzer Wednesday

This week I decided to take some initiative and change the things around my house that I hate! I have had these chairs since I got married, the first piece of furniture we bought as a new married couple. A table and chairs from Walmart (broke students). We have kept the set for years passing it around our house. Using it as a computer desk, a kitchen table, a patio table, and now my sewing table. It is old, ugly, and not very sturdy but it's all I've got so I need to make the best of it.

I decided to start with the chairs. Here is the before:

Grungy, stained, plain.

I started with a cushion recover. I found this swirl orange fabric on sale at Joann's and fell in love with the orange. My original plan was the recover the cushion and then maybe spray paint the chair. However, I couldn't decide on a color to spray paint so I went with something totally different. Mod podge. My best crafting friend. I cut some 1 inch strips of scrapbook paper that went with the cushion fabric. Then I mod podged the paper to the back of the rungs on the chair. I love how it turned out. Exactly what I wanted fun and funky. And now I have a theme for the rest of the room. Tune in to see the other makeover adjustments.


I'm linking up HERE

Rolo Brownie Pops

Last week I told you I would likely share the details of the brownie pops I made for my vintage Hollywood theme party.
I was torn between making cupcakes or brownies.  I really wanted to use cupcake toppers but I also really wanted to use my newly discovered Rolo Brownies recipe.   My problem was solved while I was at the craft supply store and stumbled upon Wilton's Brownie Pops Silicone Mold
I used the mold to make Rolo Brownie Pops and was still able to use my cute toppers.  I only purchased one mold so I spent a good few hours baking the morning of my party.  This would have been incredibly easy and quick if I had purchased more than one pan.  The Rolo Brownies recipe tells you to bake the first layer of brownies, add the rolos and peanut butter chips with another layer of batter, then bake again.  I really didn't have time for so many steps with only one pan so I altered the recipe to make it work with my timeline.  I simply used a brownie mix to make my batter.  I sprayed the pan with cooking spray then filled the molds 2/3 full with batter.
Next I pushed a rolo into each brownie bite.
I topped each bite with 3 peanut butter chips. 
I baked each pan for 30 minutes.  I repeated all the steps 4 times to make 32 brownie bites.  I will definitely be purchasing more silicone molds before I do this again!  But it was all worth it because the brownie bites were delicious and looked adorable with my vintage Hollywood icon toppers!
These would be great with out the peanut butter chips too!
 

Monday, August 29, 2011

Vintage Necklace

Heather and I may be miles apart but for some reason our brains are on the same wavelength because both of us made necklaces last week. Not the same but very similar. I have been wanting a mustard colored necklace for some time now and after searching on Etsy with little luck I decided to make one myself. I love this ONE, but I just don't have the money to spend $40 on a necklace for myself. So I used it as an idea and came up with a cheaper version that I love.

I don't have a lot of experience with jewelry making so I decided to start easy and use brown, leather cording instead of chains. I found these amazing mustard colored beads at Hobby Lobby for just $1.99. Then I spent a little extra on the bronze bird ($3.99) but I wanted it to be vintage looking and add something special to it. Then I made the rolled rose out of some chiffon scraps that I already had in my stash. I tied a knot in between each bead to hold it in place and added a flat bead to the end which is my base for my flower. Next I hot glued some felt to the back of the flower and hot glued the flower to the bead. I finished off the necklace by layering the cording to give it some stability and added a clasp to the back. Total cost of the necklace: around $10.


This project turned out so well I think I might have to try making some more jewelry. Maybe a necklace with a clay flower or a fun bangle.

I'm linking up HERE

Saturday, August 27, 2011

Inspired by the Bubblegum Necklace

I love the bubblegum necklace shared at I Heart Naptime earlier this week!  I didn't have any gumballs at home but I had some pretty beads that I used to make something similar.
My crafty Mother In Law gave me some really pretty big round beads for a different project a couple of months ago.  I ended up not using them but always knew they would be great in a necklace for myself.  Aside from my usual love for turquoise, I've been pretty obsessed with the yellow and gray trend lately.  I planned to string the necklace on white ribbon but changed my mind after I took a picture of my supplies.
I used yellow felt to make the flower.  I cut a strip of felt into four squares then folded and layered them on top of each other.  I used yellow thread to put a few stitches in the center of the felt pile.  I spaced my stitches about a quarter of an inch apart and pulled the thread tightly to give the flower some definition.  Once the stitching was done I trimmed the sharp corners to give the embellishment a softer look.
I planned to string the beads on the white ribbon until I discovered how ridiculously difficult the task would be.  I used a skinnier black ribbon instead.  I threaded the ribbon and strung all the beads.
Then I decided where I wanted my flower on the necklace.
I stitched the back of the flower directly onto the ribbon.
 Pretty!  No head shot for me because I made this little gem well after midnight.
I'm looking forward to dressing up a plain shirt with my new necklace!  Thanks to Jamielyn for the inspiration!

I'm linking this post here.
 

Friday, August 26, 2011

A Sadie Shirt for Sadie-Friday Fun Find

While I was visiting family and friends in Seattle I met up with one of my best friends from high school, Shelby. She still lives in Seattle with her husband and two cute kids. It is funny because her kids are nearly the same age as mine but opposites. I have an older son and younger daughter, she has an older daughter and a younger son. Anyways, we love getting together with them whenever we visit. While we were playing at the park she complimented me on the shirt Elizabeth was wearing. So I offered to make one for Sadie.

When I got back to ABQ I found this adorable pink flower fabric at Joann's and instantly thought of Shelby. It is happy and pretty, exactly the way I think of Shelby.

I love how it turned out. I changed it a bit by adding ric rac and a boarder to the bottom and sleeves. Even though I have made this pattern before I still had some hang ups which is good. Practice makes perfect especially when it comes to sewing. I definitely need to work on my sleeve work. I just know Shelby and Sadie will love it.

*Jackson volunteered to model it for the pictures, (I bribed him), what a trooper.

Thursday, August 25, 2011

Quilt Block Decision

Well I decided on my quilt block for the quilt exchange. I took your recommendations as well as some from the quilt group and decided to make the ruffled block. I am really bad at quilting. It is the numbers and measurements. I just had the hardest time coming up with the correct 12.5x12.5 block. I guess I bring it on myself because I don't like to use patterns. After fiddling around with the strips and my ideas I decided on this:


It uses 4 jelly roll strips at 2.5x12.5. Then another jelly roll strip cut in half so it is 1.25x12.5. The last piece is a white strip used for the ruffling measuring 4x24. This seemed to work with a little adjustments in the seam measurements. I am happy with the result. I know the ruffle will make it hard to actually quilt on it but I love the dimension it will bring to the quilt. Did I mention that I am making this for my king size bed. I need a new bedspread. Hopefully the other members in the group will approve of the ruffle.

I also added ric rac to my personal blocks just for fun. Thanks for all the advice. I will be sure to show you the quilt top when I receive the other blocks.

I'm linking up here

Wednesday, August 24, 2011

Arizona Moms Night Out event

Our blog sponsored a fun event last week.  I was really excited about being part of the Arizona Mom's Night Out!  I attended the event in May and met some really wonderful girls.  In addition to attending, this time I made a couple of pretty headbands to be included in the raffle.

I sat with Cristin of Crissy G.'s Designs.  We had a great time enjoying some kid free time together!
There were so many wonderful raffle items donated by local vendors.  I was very excited when I saw my name written on the winner board!  I ended up winning two prizes - a cookie jar and a gift certificate for a custom photo canvas. 

The cookie jar was donated by Paint Time Pottery and looks perfect in my kitchen!
The custom 12" x 16" canvas was donated by Faville Photo.  I was really excited to win this gift certificate.  I initially planned to have a drawn stick figure family picture my daughter created turned into a canvas for my office.  I changed my mind when I realized I hadn't printed any of our 2010 holiday pictures.  Jessica did a great job with our photos last year and I have been meaning to get a few framed.  This was the perfect opportunity to get one of those pictures up on our wall.  I emailed the picture to the print company Monday morning and was able to pick up the canvas today.  It turned out beautiful!
I hung it next to our 2009 holiday picture canvas (photos by Jessica, canvas by The Canvas People) and my favorite picture of me with my daughter (photos by Serenity Pictures).
Both events I've attended had a raffle designated specifically for Pray for Kate.  Beautiful little Kate lives in Arizona and is currently battling brain cancer.  It's wonderful to see our community pulling together to assist this sweet family.

I'm already looking forward to the next event.  If you're in Arizona, don't miss out on the fun!  Go check out the Arizona Moms Network and start getting email updates about their upcoming events. 
 

Tuesday, August 23, 2011

Vintage Hollywood theme party

One of my best friends recently became a consultant for Lia Sophia jewelry.  I jumped at the opportunity to host a jewelry party at my house this weekend.  It was the perfect occasion for a vintage Hollywood themed party!  I had so much fun decorating.  I set up a dessert table and photo area with props.  We even had a red carpet at the entrance to the party! 
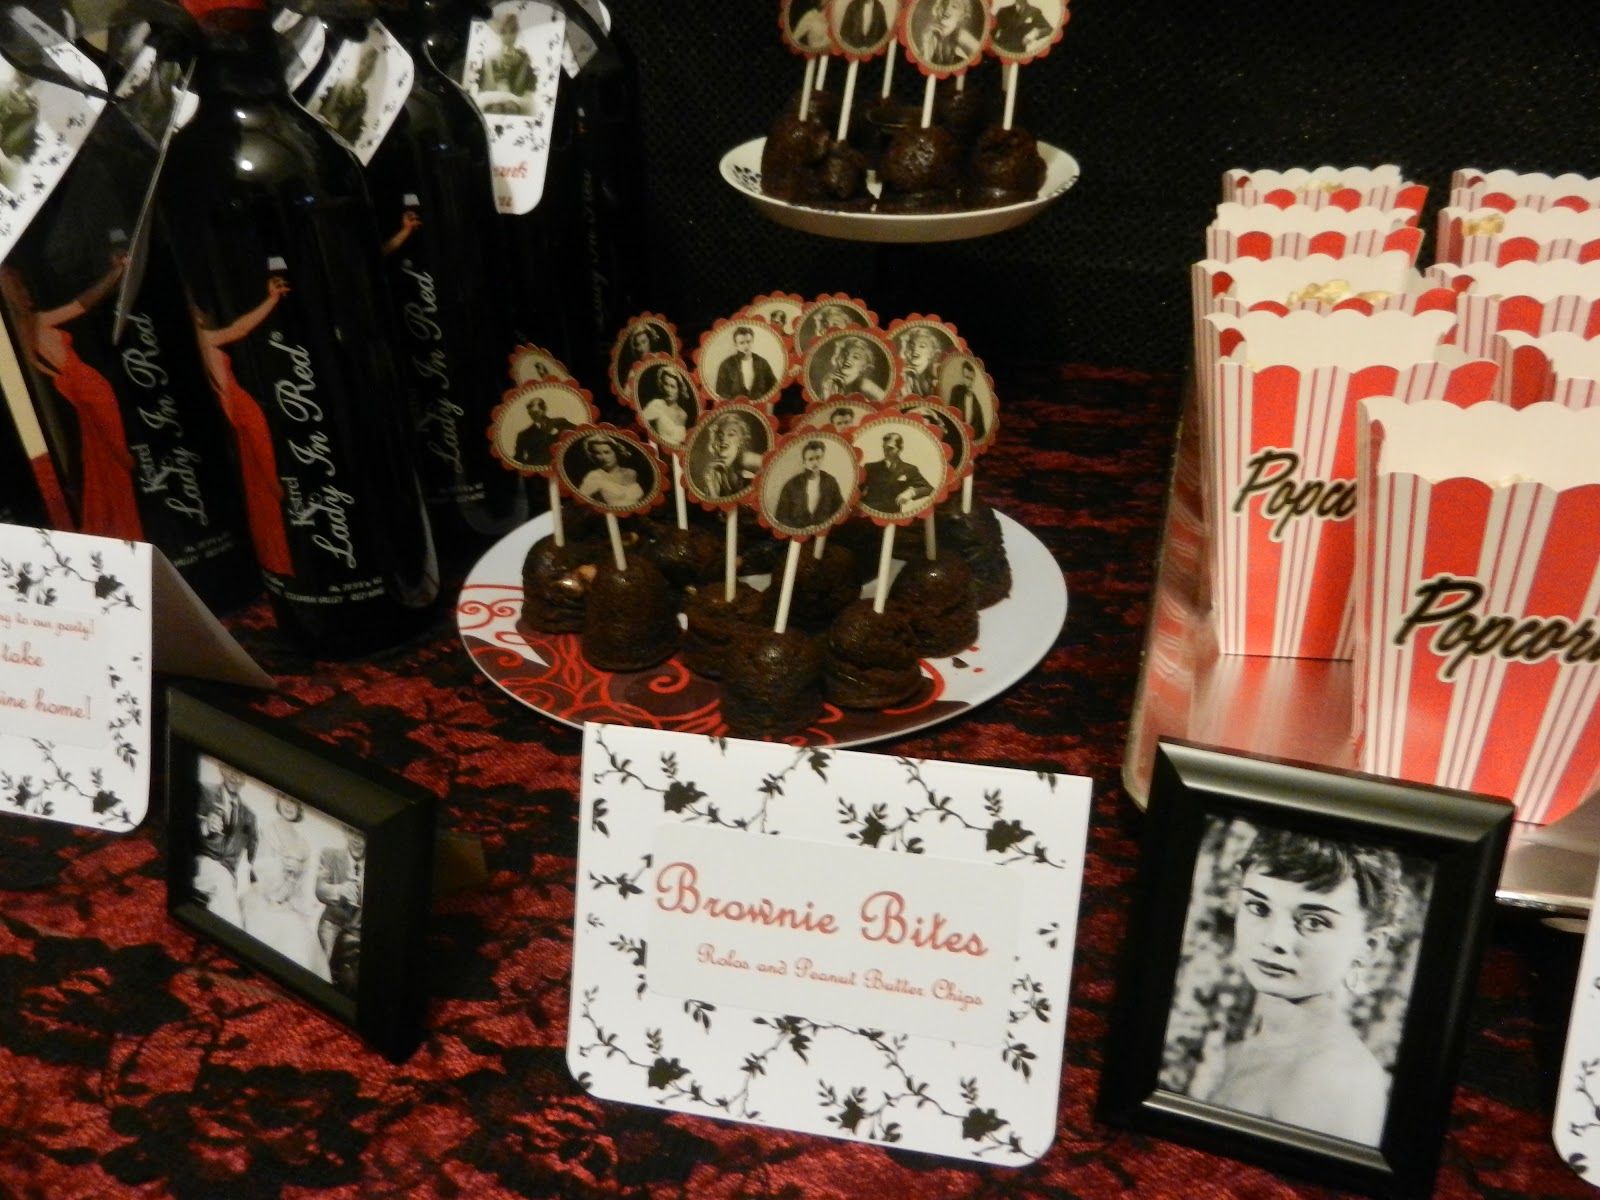
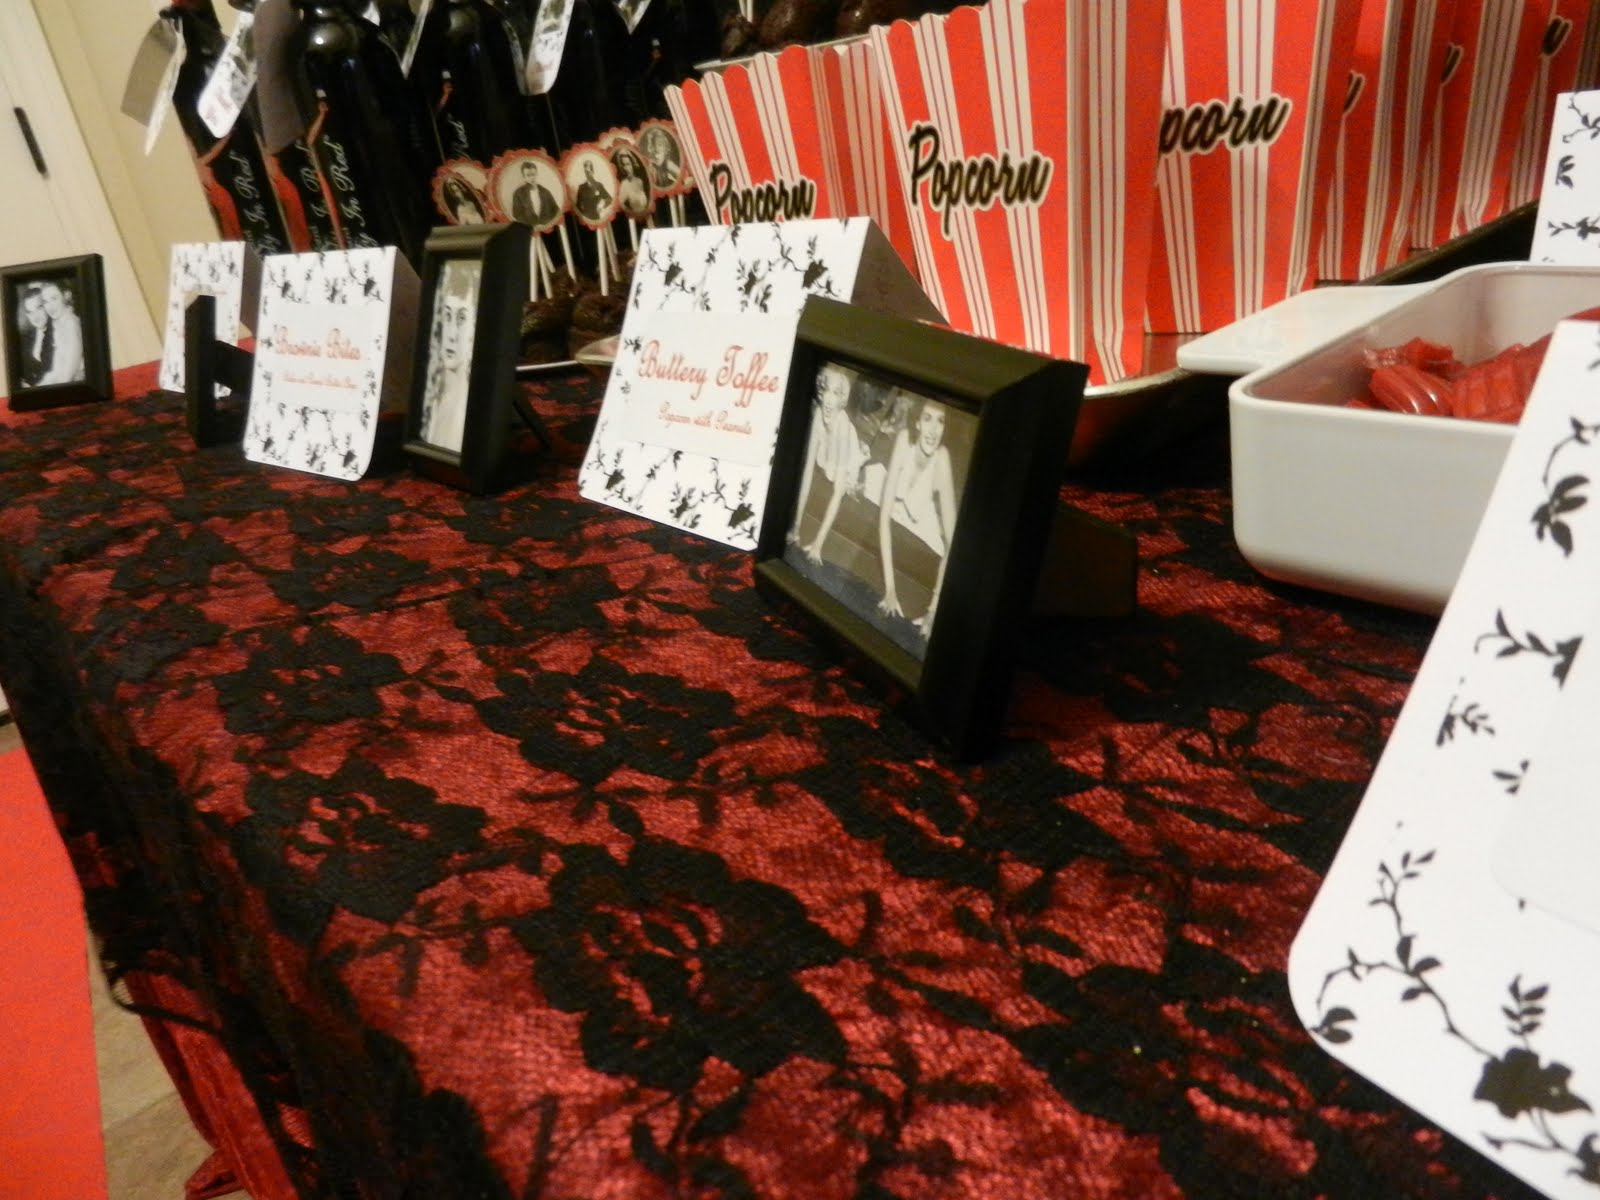
I had a lot of fun putting a dessert table together.  The party was after dinner and I wanted everything to fit around a movie theme.  We had brownie bites, butter toffee popcorn, crackers with strawberry cream cheese spread, kit kats, and licorice.
 For drinks, I served a pink lemonade spritzer and wine. 
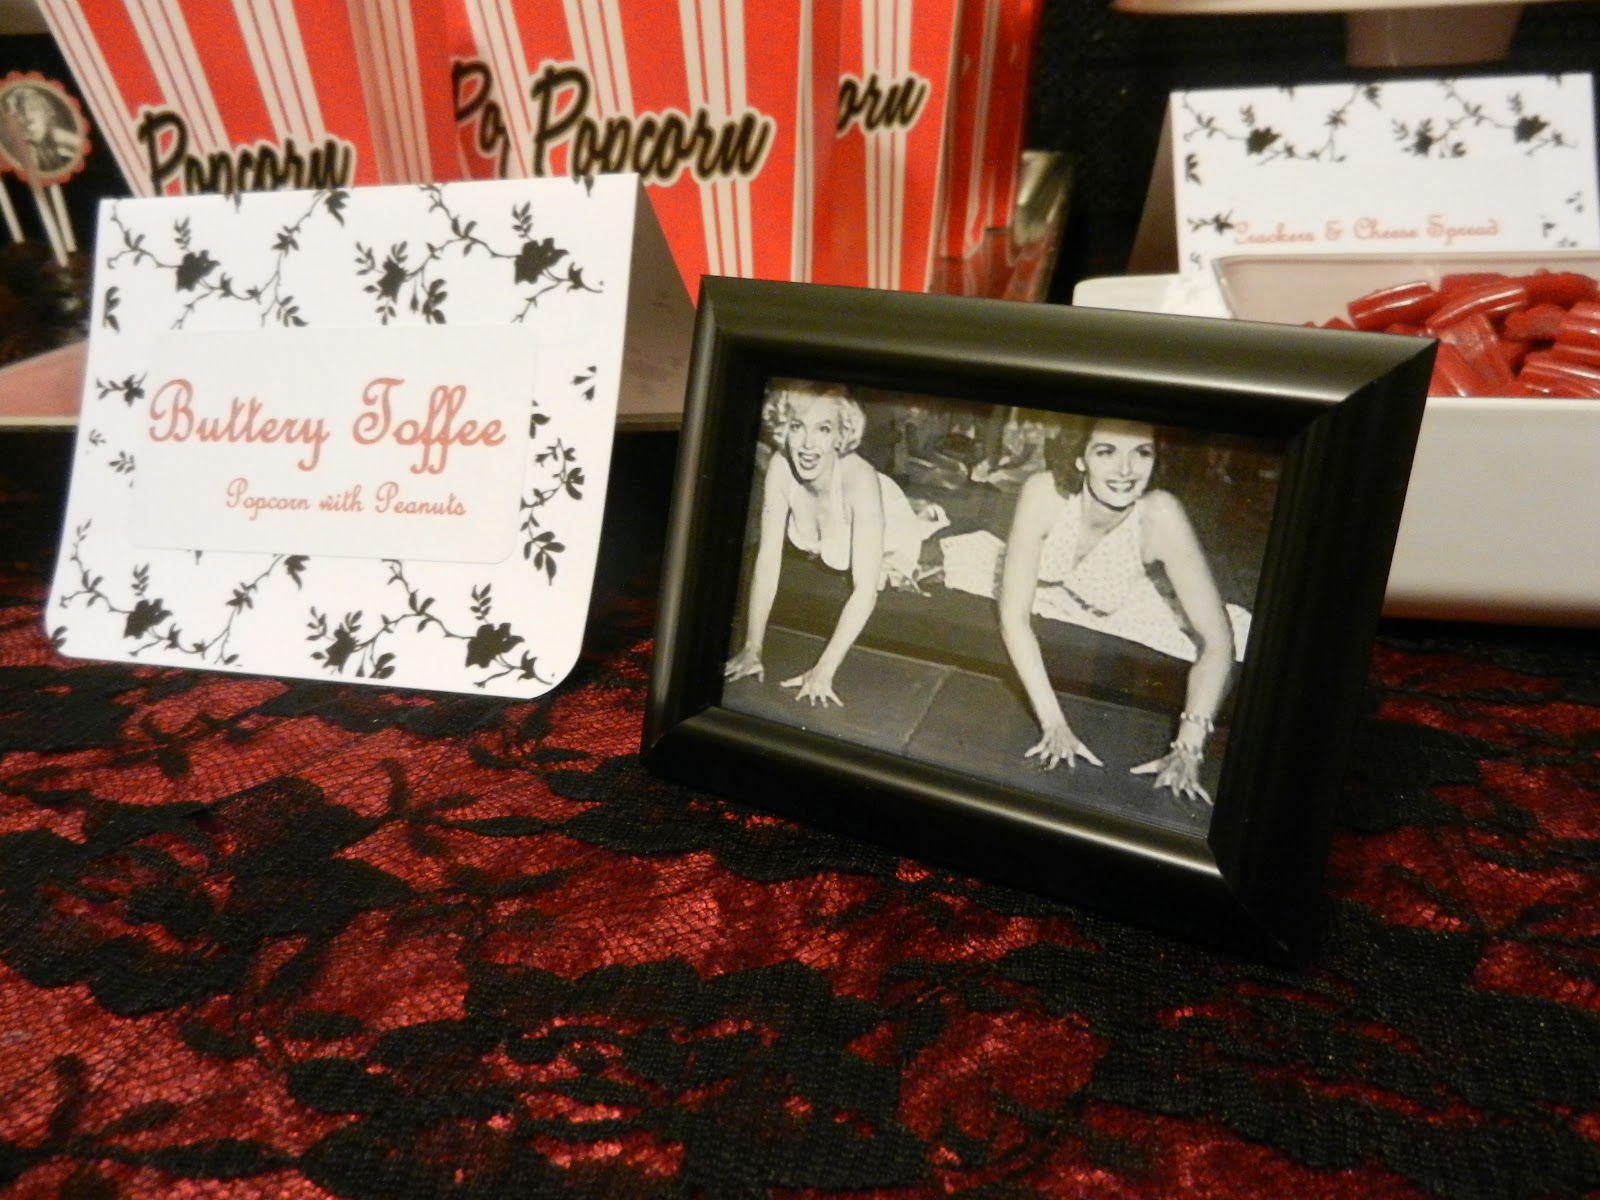
I made everything for the table myself and loved how it all came together.  The lace image used for the background of the food labels matched the vintage theme perfectly.  I printed black and white photos found online and put them in frames I already had at home.   
The popcorn boxes were purchased from a local party store.  The stripes added to the vintage feel.
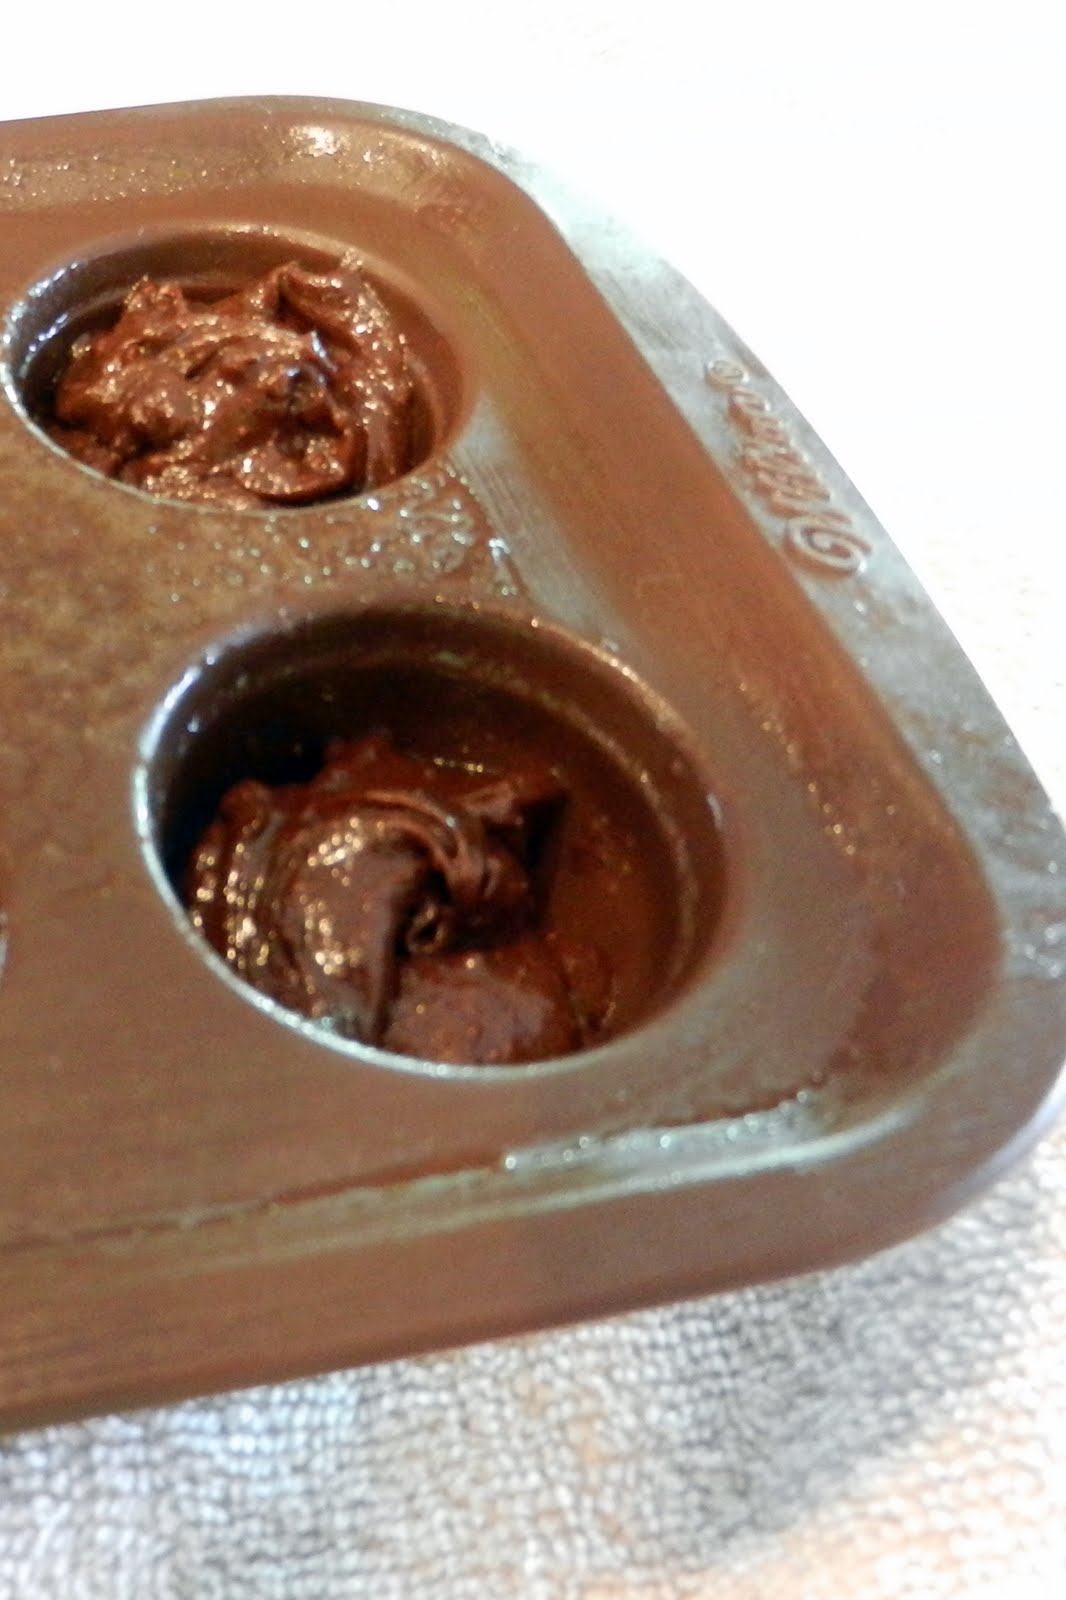
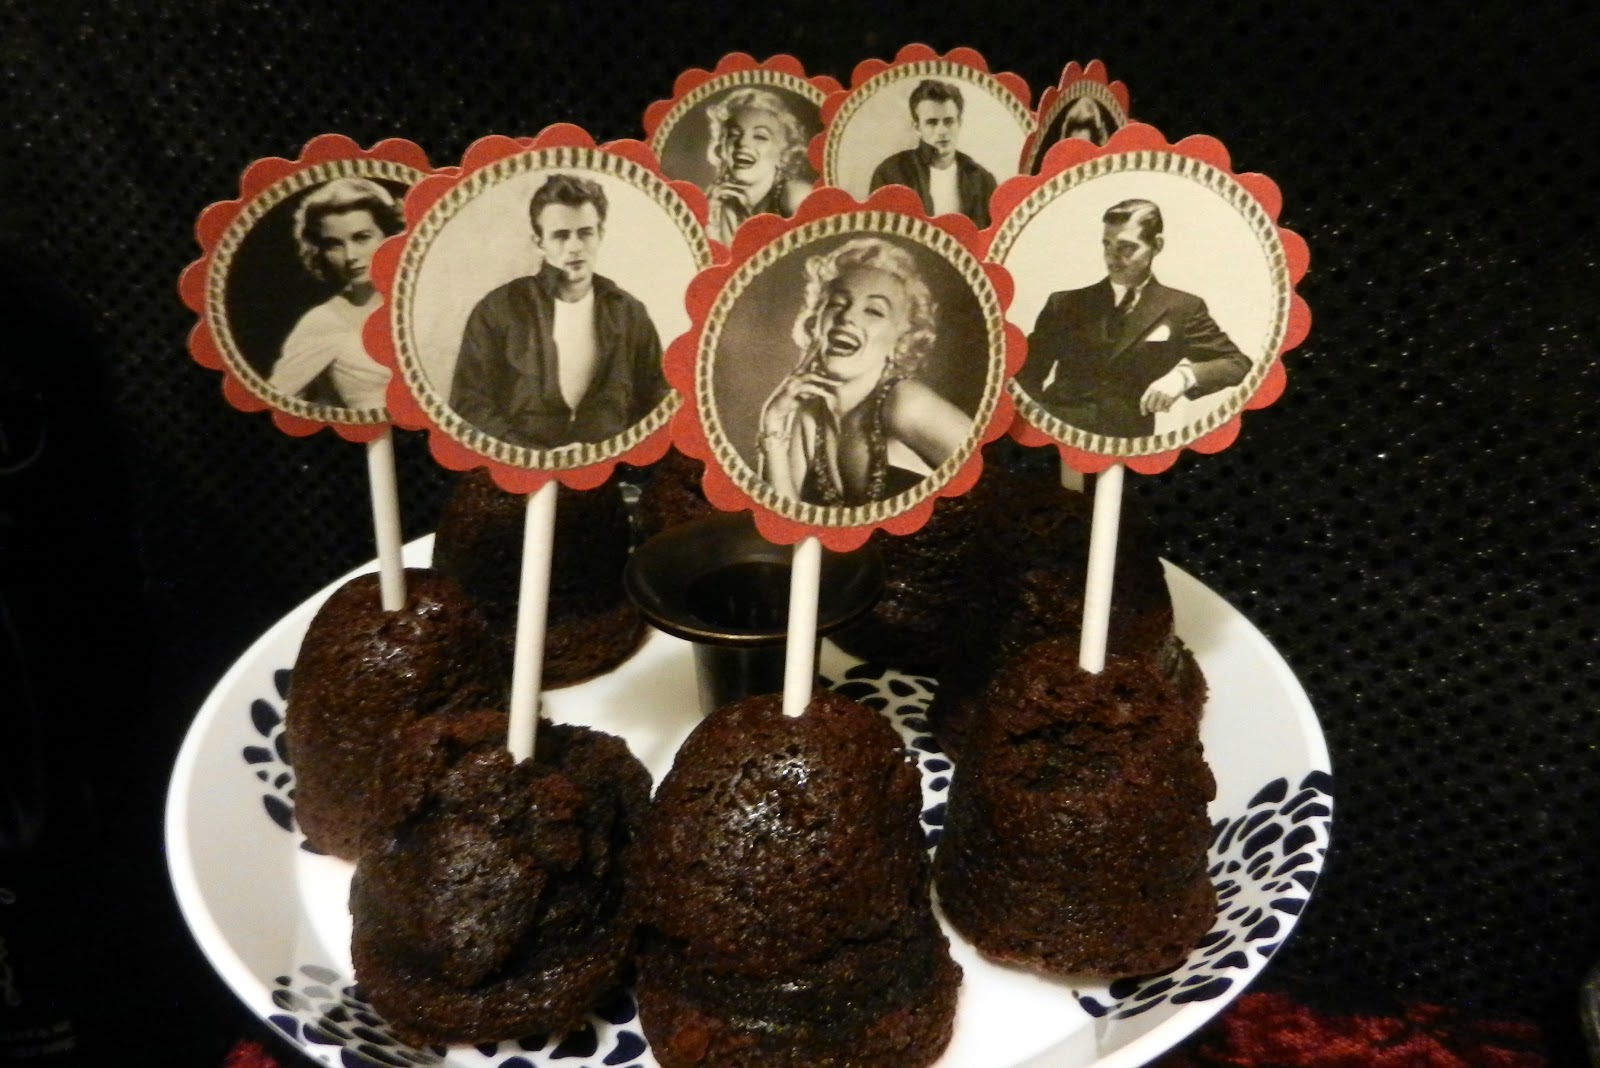
I made cupcake toppers using images I found online of Hollywood icons.  They turned out so pretty!   The brownie bites were delicious!  I plan to share the recipe later this week.
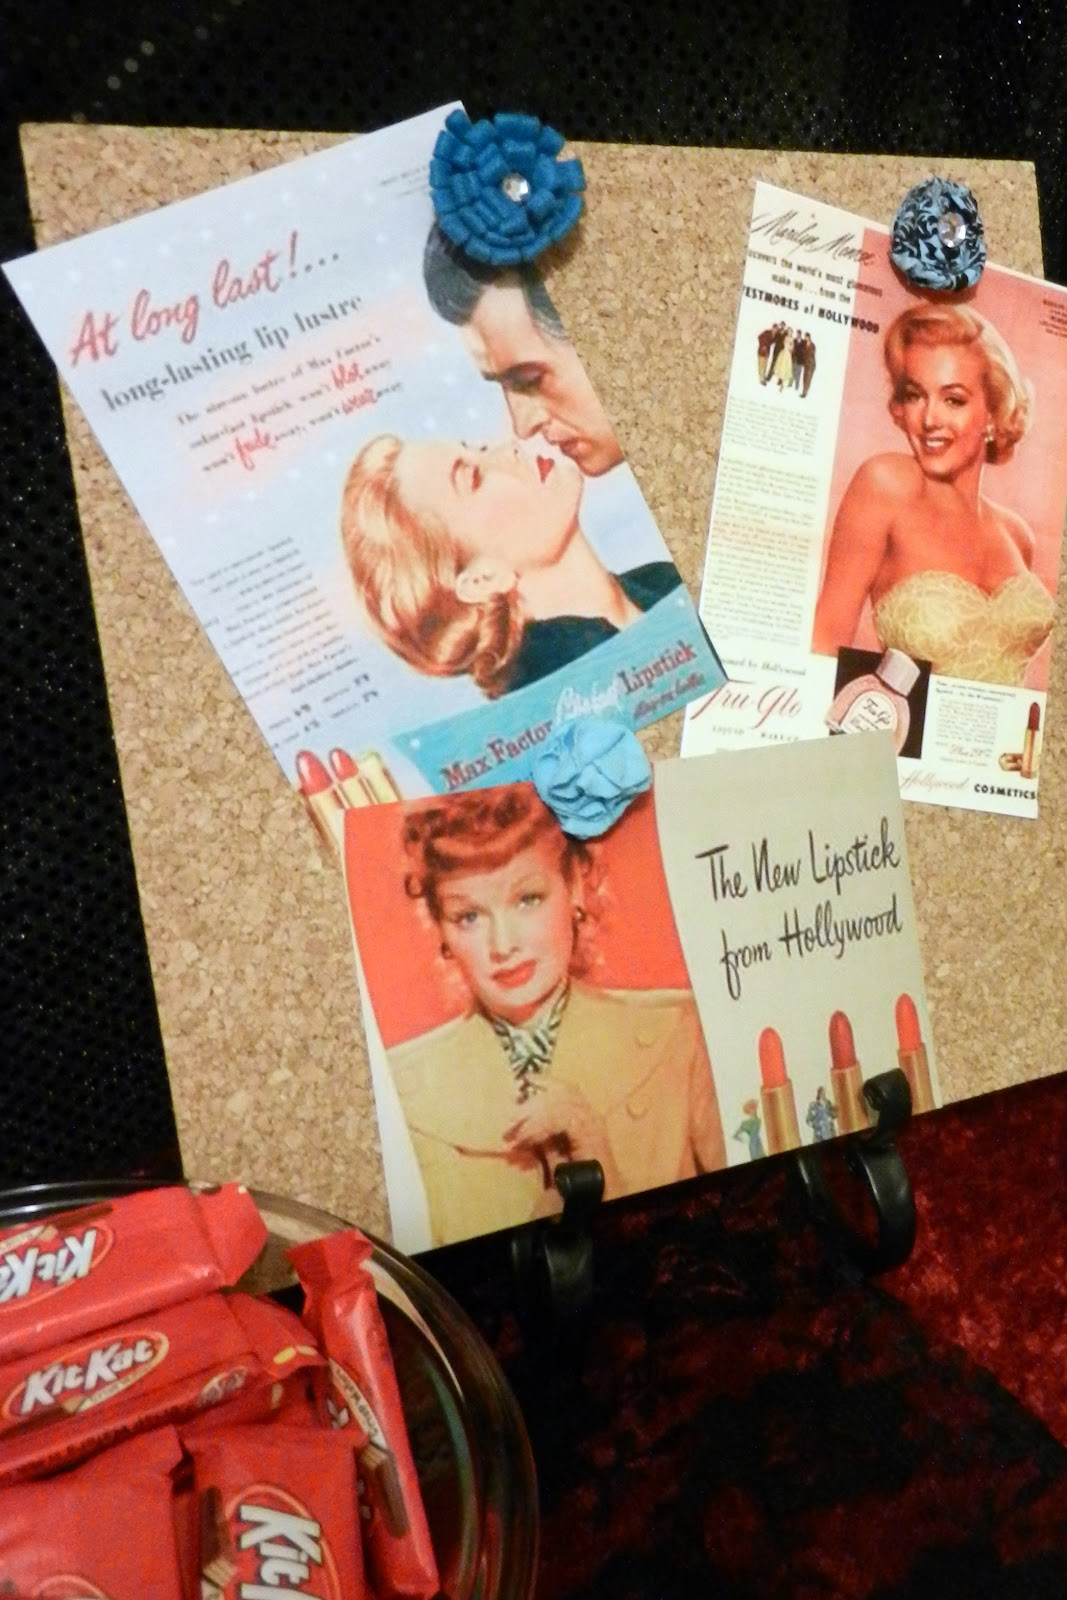
I used a plate display stand and a single piece of cork board to make a fun display with old make up ads.  The ads were also found online and printed on my home computer.
I tied a ribbon on a vase and used it for plastic forks.  This looked prettier than simply putting them out on the table.
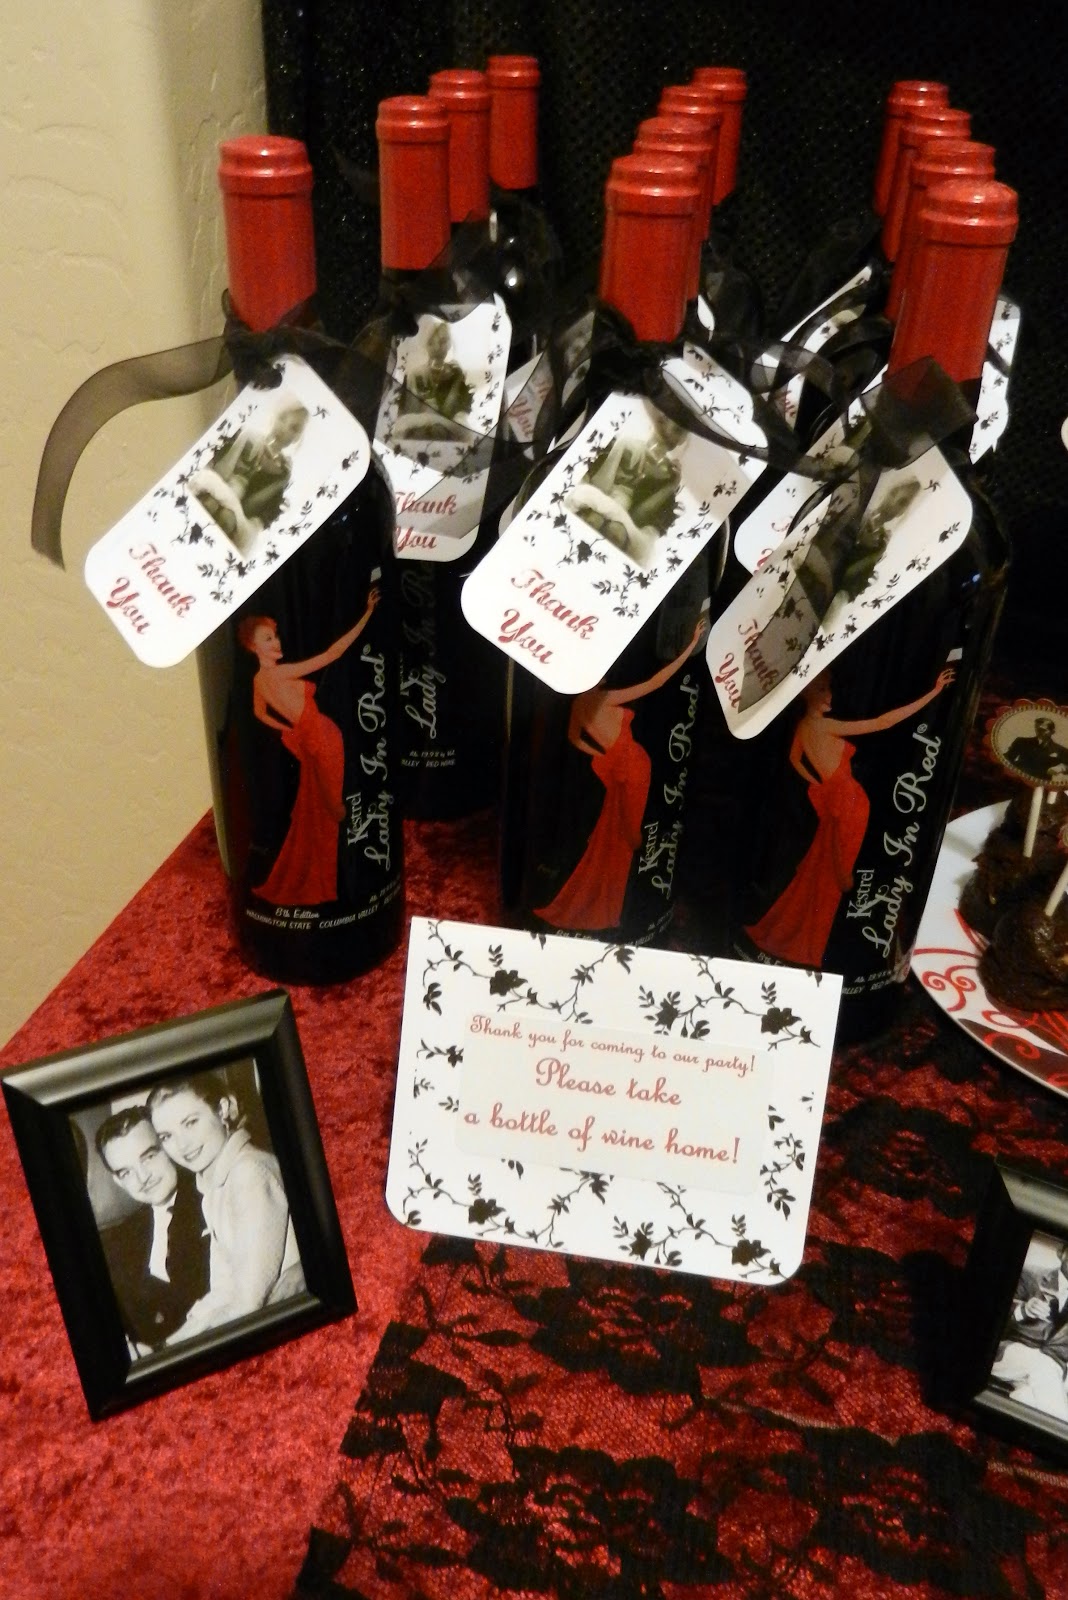
I purchased Lady In Red wine for each guest to take home as a thank you gift.  I made the thank you tags with the same lace image as the food labels and added a picture of Marilyn Monroe holding a wine glass.  The tags were attached with the same black ribbon used on the vase with the forks.
I made two banners for the party.  They both consisted of images found online and printed from my computer.  The banner for the table had old movie posters, pictures of Hollywood icons, and a great picture I found of the Hollywood sign before the "land" was removed in 1949.
The second banner was used in the kitchen and was made up of vintage magazine covers.  I strung the prints on pearls to go along with the vintage theme.
The Lia Sophia displays were so pretty and had gorgeous jewelry for us to see.
I hung a red velvet drape to serve as a backdrop for funny photos.  Everyone was forced to take a picture with me and silly props before they went home. 
My mom and I
The party was a lot of fun and I'm really looking forward to getting my Lia Sophia package later this week!

I'm linking this post here.