
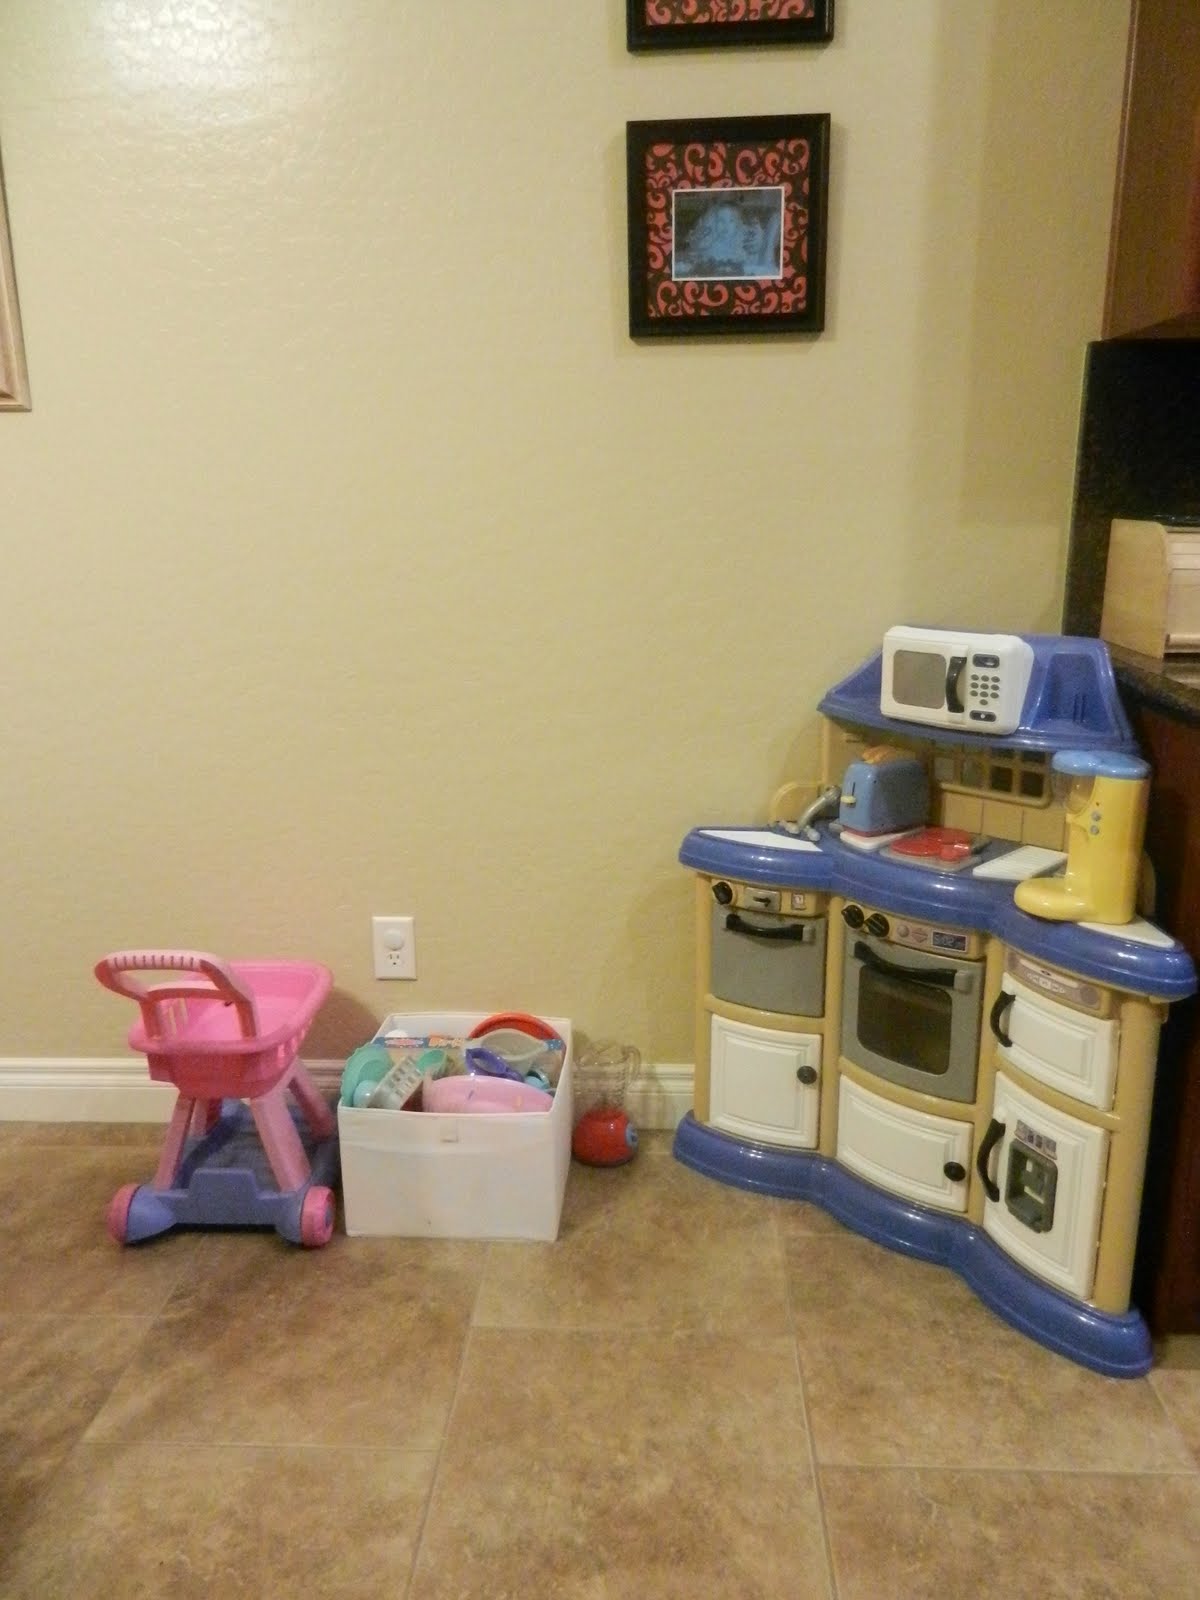
My in laws gave my daughter a cute little play kitchen for her second birthday last year. She has a small corner in our kitchen where she pretends to cook, wash dishes, make tea, and shop. She loves playing kitchen!!
Tomorrow we are having family over for an egg hunt and lunch. Instead of cleaning or cooking or doing any of the ninety things I have to do before 11:00 am tomorrow, I decided to make a cardboard regrigerator for my daughter's kitchen space. The project didn't exactly go as planned (notice I'm posting after midnight and have an incredibly busy day tomorrow!). Lets just say the refrigerator that was supposed to be easy and cute was not so easy and is not so cute. Luckily the only opinion that matters is my two year old daughter's and I'm sure she will love it.
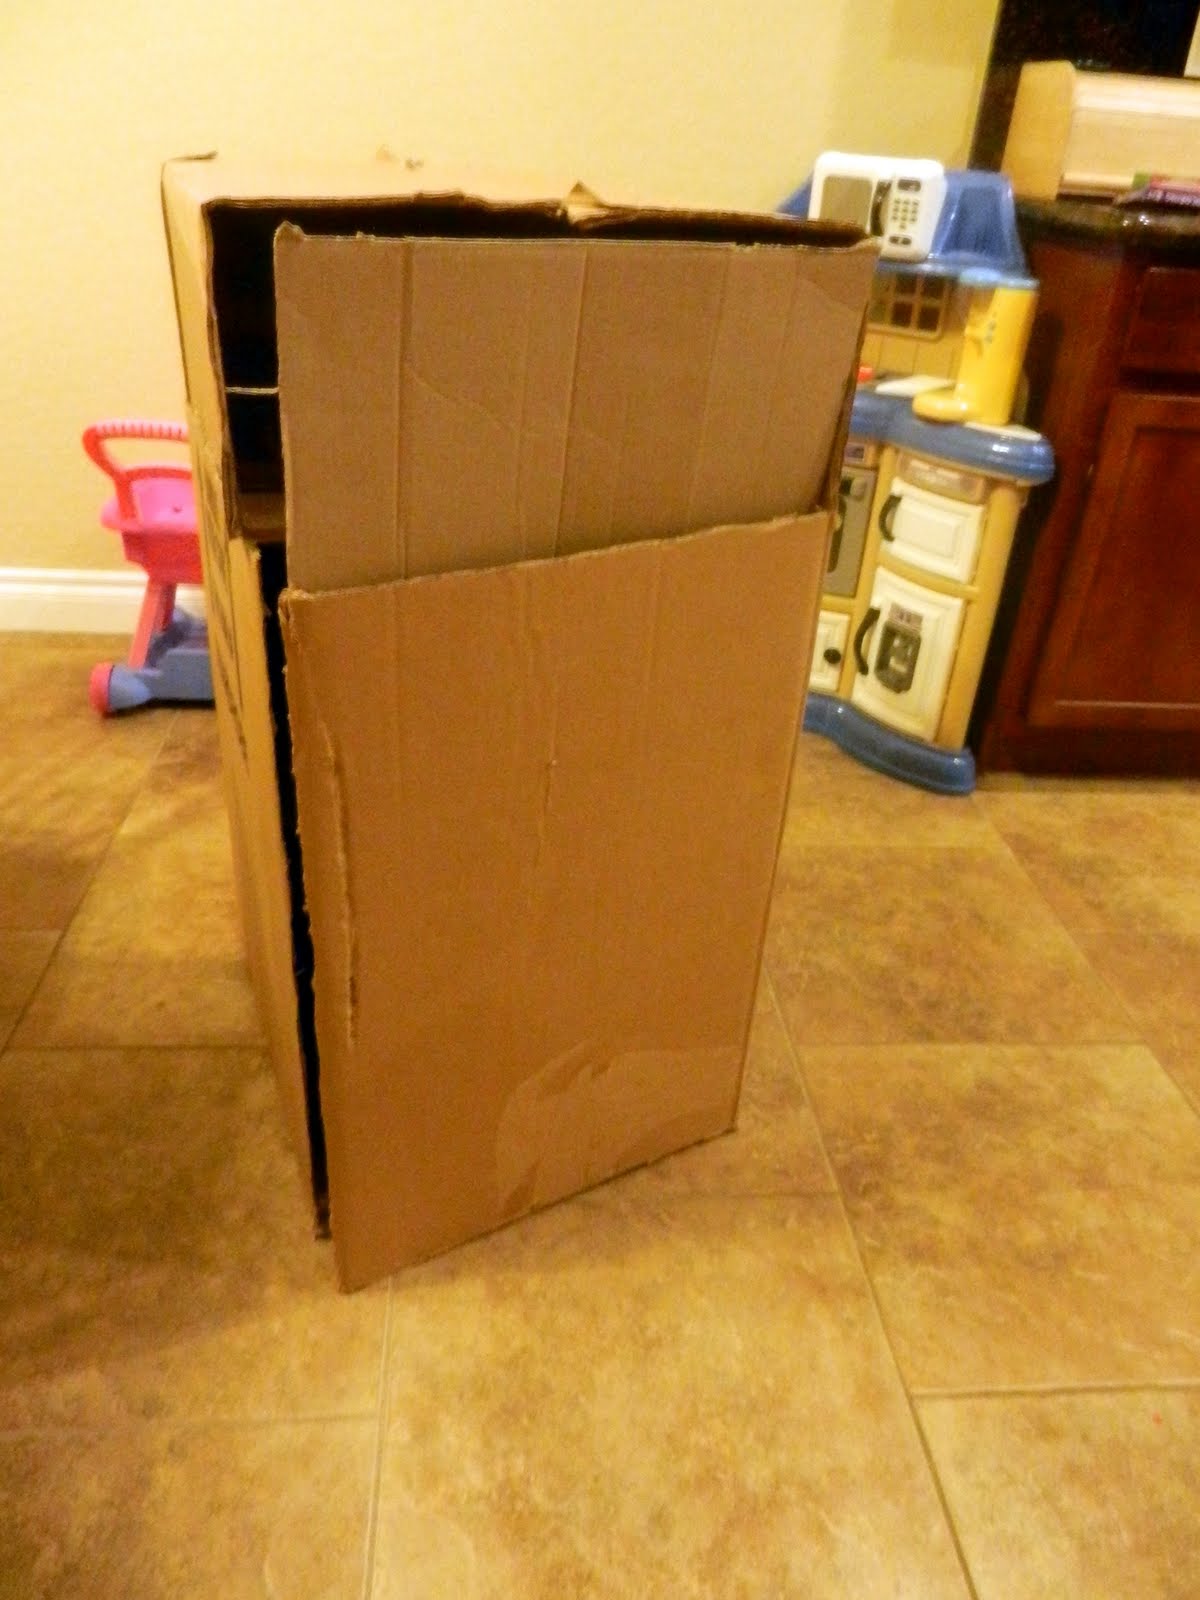
I started by cutting a couple of cardboard boxes and gluing them together to make a bottom with shelves, a freezer, and two moving doors.

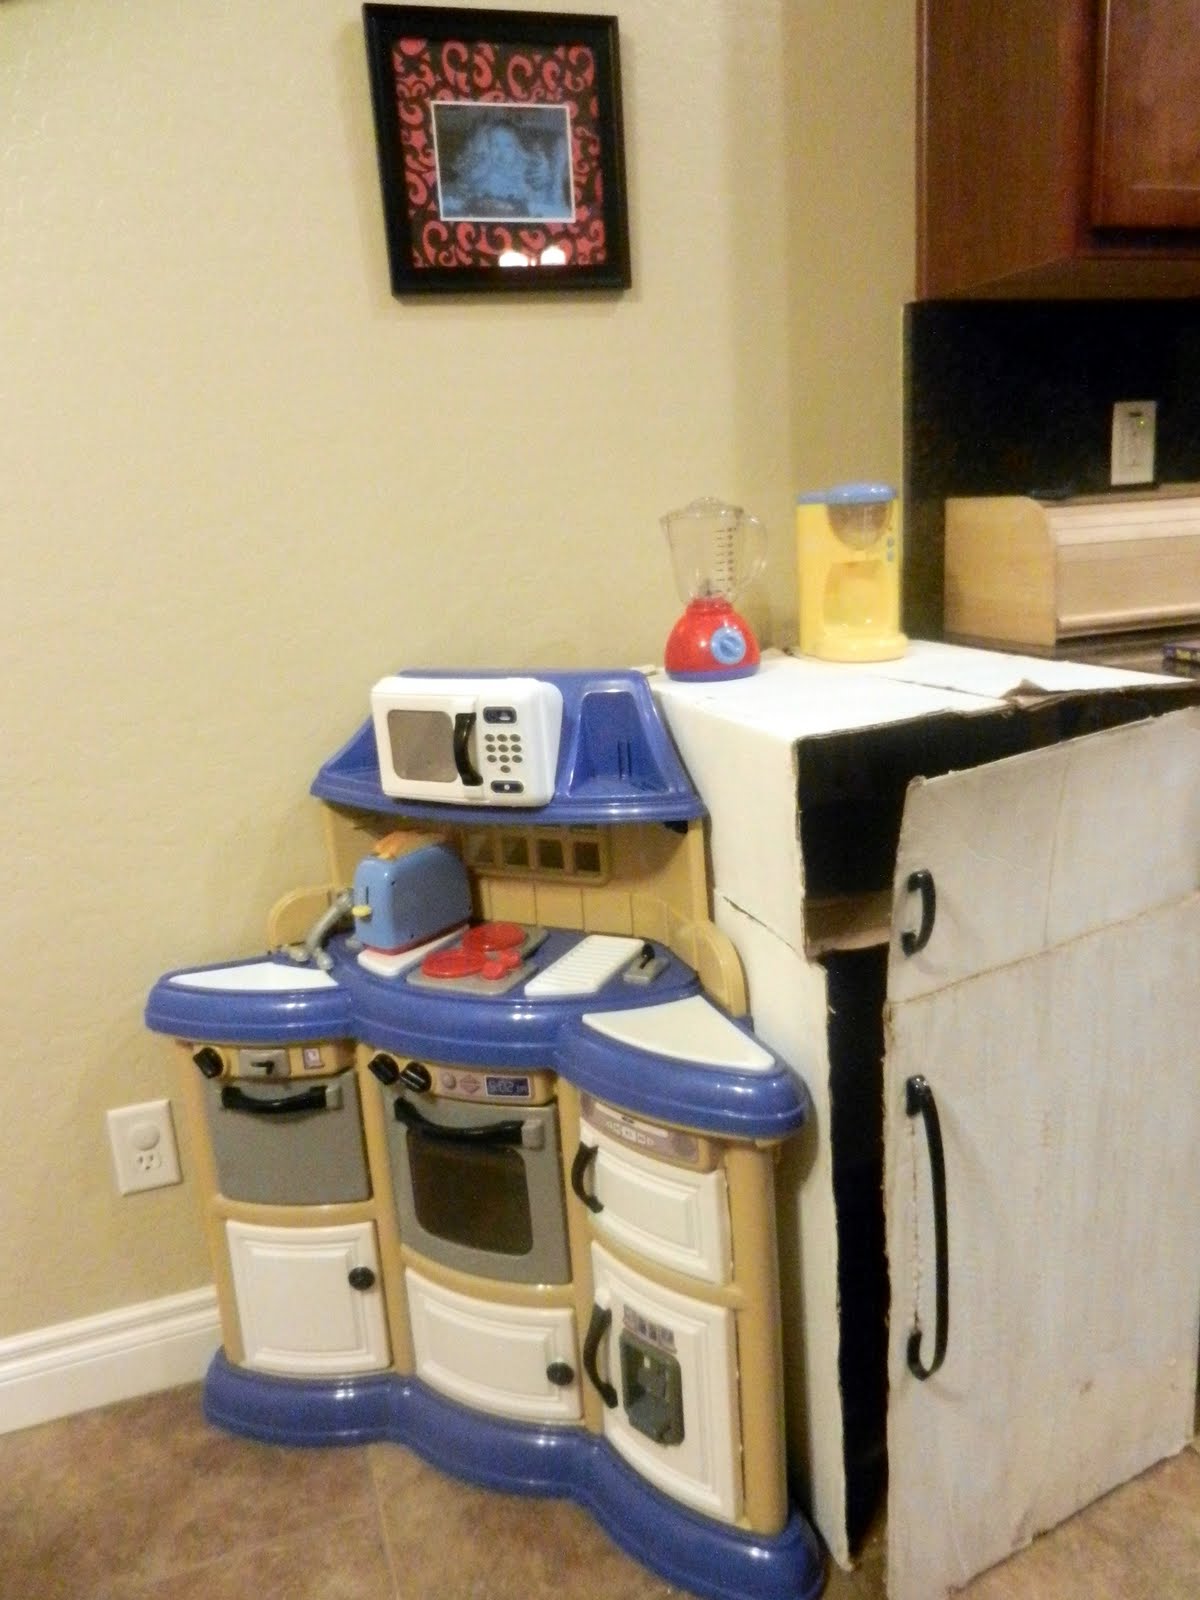
Then I painted the cardboard white. I won't go into the poor choice I made with using acrylic paint on cardboard. Perhaps I should start a "what not to do" series. Maybe this project will be the first post there. I'm getting sidetracked. So I painted the exterior white and then found a belt that is about seven sizes too small for me (really, it was hooked to a clearance shirt I bought last year but was clearly the WRONG size!).

I cut the belt and made handles for the regrigerator doors. I just used hot glue to put them in place. I'm aware this is not a very attractive refrigerator...
...but take a look inside! I printed images from an online grocery store and glued them inside.


More groceries definitely would have completely made up for the ugly exterior, but lets be realistic, it's late and tomorrow is Easter. Maybe I'll let my daughter go "shopping" online and add grocery cut outs next week.
I also wanted to share that this evening I tried using my hot glue gun on some eggs because of Jessica's fun post yesterday. What a great idea! I'm not really sure why but the glue stuck to a few of the eggs. They still look cute!

My daughter had fun watching the eggs turn colors and then watching me try to peel off the glue. Here's an example of an egg where the glue actually peeled off easily.

Char from Crap I've Made shared a great idea for dying eggs using rubber cement glue. Hers turned out much prettier but it was still fun to try something new! You can see her orginal post here. I used the rubber cement and then dropped the egg into another color after I peeled off the glue.


1 comment:
It stuck for me too I think the eggs have to b really cold.
Post a Comment