
First for the flower. There are many ways of making this, this is just how I like to do it.
Step 1: Take your strip that you made (at least 64" long).
 Fold it in half wrong sides together, press it really well, and sew a loose stitch in down the raw side leaving thread at the ends for pulling.
  It doesn't matter that there is open ends or raw edges because they will be tucked under. Now you are going to pull on of the thread pieces to create a ruffle.
Step 2: Lay your front piece down and figure out where you want your outside of your flower to start. Tuck the end underneath and begin rotating the ruffle around in a circular motion layering the ruffle on top. I like to start at the bottom and fix the flower in place the way I want it before I pin it in place.


 Tuck the end under and pin it in place.
 Step 3: Now we are going to sew the flower down to the front of the top. Beginning in the middle use a regular stitch and follow the flower around in the circular motion.
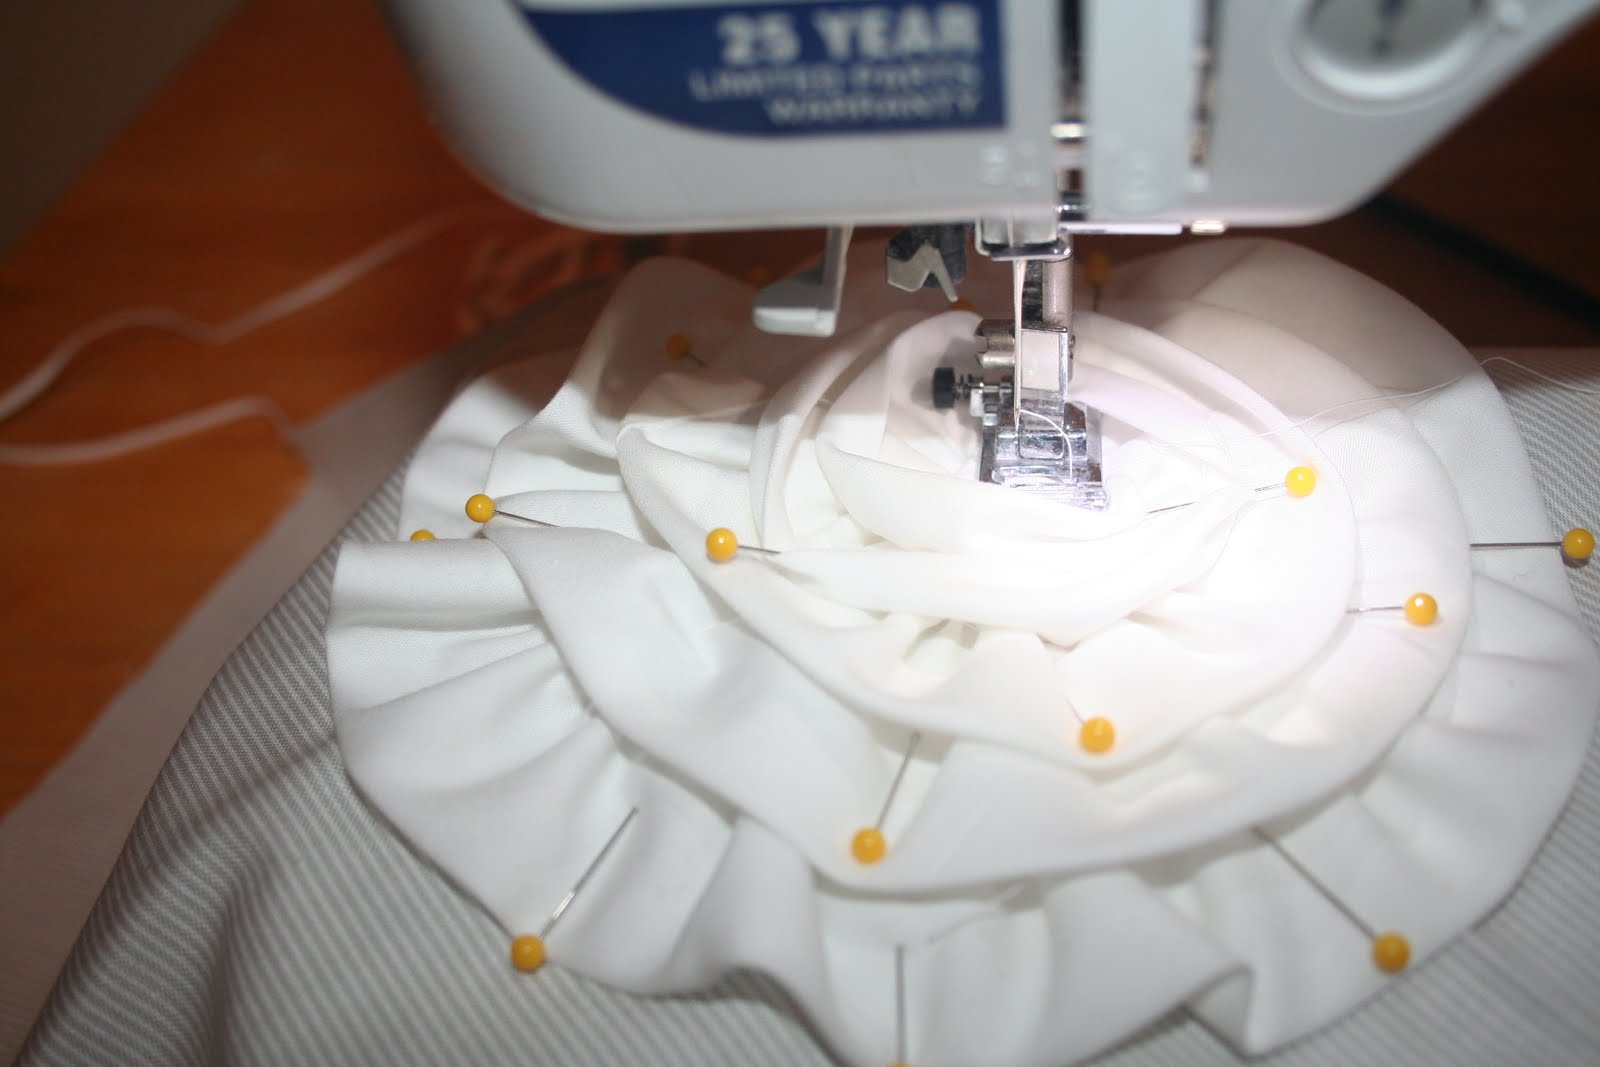
 I try to sew directly on top of the loose stitch I made for the ruffling. One trick is to lift the edges as you sew and pull the pins as you sew. At the end back stitch so it stays in place.
  Now your flower is attached.
 Finally press the flower down for a smashed look.
Now a short tutorial on making bias tape by hand. You can use pre-made bias tape (which I would recommend if you can find the right color and don't want to use a print.) Normally I would just buy white bias tape but for this purpose I will teach you to make it. Please ignore my gross ironing board cover. I have been meaning to make a new one but that project is on the back burner.
Step 1: Start with a long piece 2 inches wide. Fold it in half wrong sides together and press.


Step 2: Open it back up and fold the raw edge towards your middle crease. Then do the same to the other side. Press them down.


 Step 3: Fold it back in half with the raw edges in the crease.
 Now you have your bias tape.
 Now your bias tape is ready for the final part tomorrow.
Tomorrow we will add the sleeves (2 different kinds), finish the neckline, and finish the bottom. Thanks to everyone that is sewing along and let me know if you have any questions.
1 comment:
I've been going through your guys' blog and LOVE all these great tips and tutorials for sewing kids clothes!!! Just wanted to let you know how much I'm enjoying it and that you have a new follower :D
Shelley
www.westermanfam.blogspot.com
Post a Comment