
I told you before how I met the most incredible group of girls while attending Creative Estates, right? Today I am so excited to share another great friend I met at the conference. Rebecca from Freckles Crafts is super sweet and has a fantastic craft site for children.
Her blog has great family and children ideas while her shop sells fun craft kits. Rebecca has craft kit options for both boys and girls. Her Craft Camp really caught my attention!


Don't miss her new USA Blocks! She is giving away a set! Go here to find out how to enter this great giveaway.

School is out and I'm sure you are looking for ideas to avoid summer boredom. Let Freckles Crafts help you plan a summer of fun!

I am so excited to be a guest on A Couple of Craft Addicts and even more excited that it is Flip Flop week! I have a slight flip flop obsession, and once it turns warm enough for my toes to escape the confines of winter boots you are sure to see me sporting a pair! My boys definitely take after me in this department, and when Heather asked me to do a tutorial on how to embellish flip flops I just knew I had to make some for the kids. There are so many cute flip flops for girls. You can find them embellished with butterflies, buttons, flowers, glitter, ladybugs, and every single Disney Princess. And for boys…there is not much choice. So when you can’t find what you are looking for then customize your own! In this tutorial I will show you how to make a pair of pirate and rock and roll themed flip flops.
So here is what you need to get started:
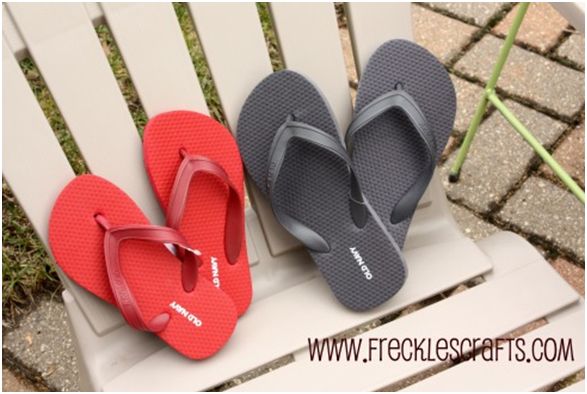
· Flip flops (I got the plain rubber kind at Old Navy. Two for five bucks! Score!)
· Embellishments. (Anything that can withstand the wear and tear kids put on their shoes can be used(i.e. puddle jumping, climbing, kicking their brother J). I used rubber thumbtacks that can be found just about everywhere from the craft stores to Target and Walmart. They are usually located with the teen room design stuff. I found mine in the clearance bin at Michaels for $.79 for a pack of 9. (Score two for me!) You can also check the scrapbook department at your local craft store for embellishments.
· Vinyl words (Arrr and Rock Star)
· E600
· Clothespins
· X-Acto Knife
· Mod Podge and Paint Brush (not shown)
· Clear acrylic spray

Directions:
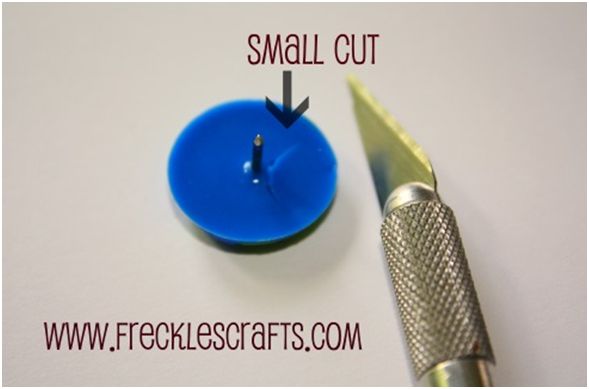
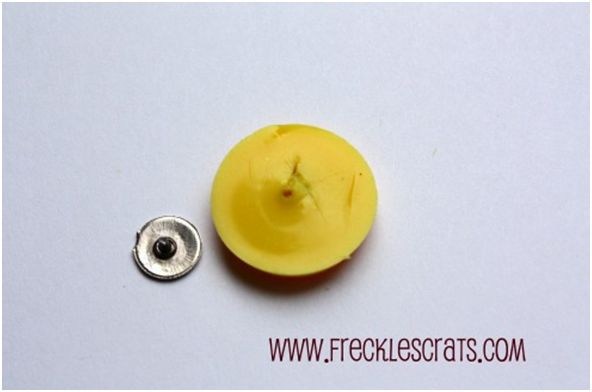
Begin by removing the thumb tack from the rubber front. To do this, use the X-Acto knife to make a small slit on the rubber back and then pop the tack out. Don’t worry about having a cut in the back because you will not see it when it is attached to the shoe.

Once you get the tacks removed you can begin gluing the embellishments on to the flip flops. Decide how you would like the embellishments to look on and lay out your design. Wen you have your design plan add a small dot of E600 on the back of one of your embellishments and glue it directly to the flip flop strap.
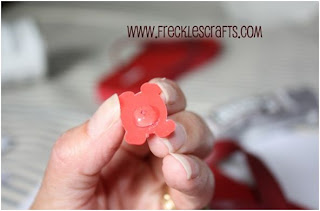
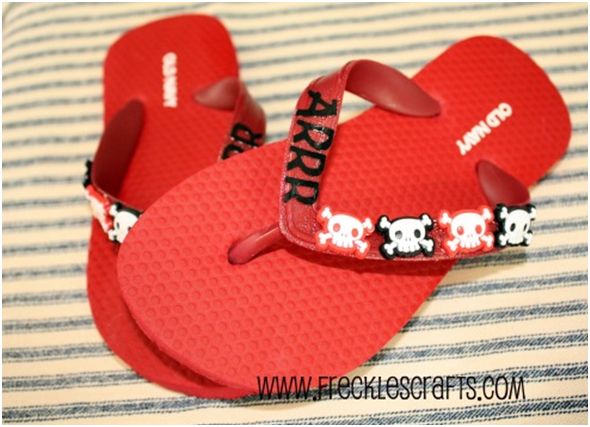
Here is how the pirate embellishments look glued to the straps.

It takes some time for the glue to dry so here is a little tip: use clothespins to hold the embellishments in place while you move on to the next step! Works like a charm! I also put a paper towel around the toe strap to hold the straps up while the glue dried. This seemed to help keep the embellishments edges tight on the straps.

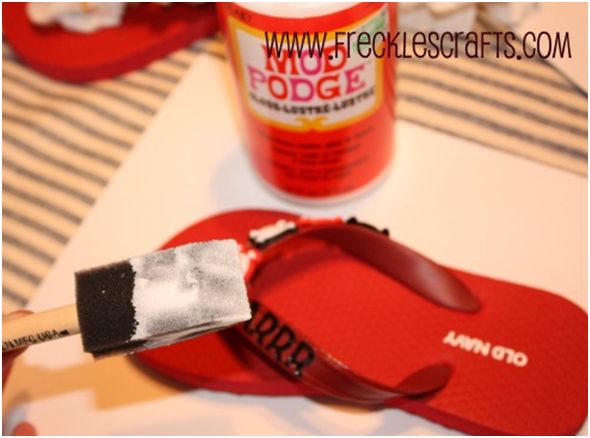
Cut your vinyl letters. I used my Cricut and cut the letters to be ½ inch size using the George Font. If you don’t have a cutting machine then you can use an X-Acto knife to cut out the letters or use letter scrapbook stickers. Apply the letters to the straps and apply a thin layer of Mod Podge over the letters to secure them in place.
The last step is to spray the straps with a light coating of acrylic sealer. This will help the shoes to be water resistant and keep the vinyl letters in place. Tip: cover the shoe part with a paper towel so only the straps get sealer on them. If you don’t do this the shoes will be pretty slippery. Not fun for little ones who will run right out of their shoes!
So here you have it! A quick and easy project that took boring flip flops from this:
To This:


Super cute right? Thanks A Couple of Craft Addicts for allowing me to share my tutorial with you!
Thanks for sharing this fun tutorial Rebecca!
4 comments:
Thanks girls for having me as a guest this week! I really enjoyed working with you and what a fun excuse to make some new flip flops!
These are so cute Rebecca!! I love the buttons paired with the letters - that is such a cute idea!!
Thanks Bev! You are not an easy act to follow :) This flip flop series has been a lot of fun. So many great ideas!
I love having a boy idea! So cute, Rebecca!
Rebecca@RootsAndWingsCo
Post a Comment