
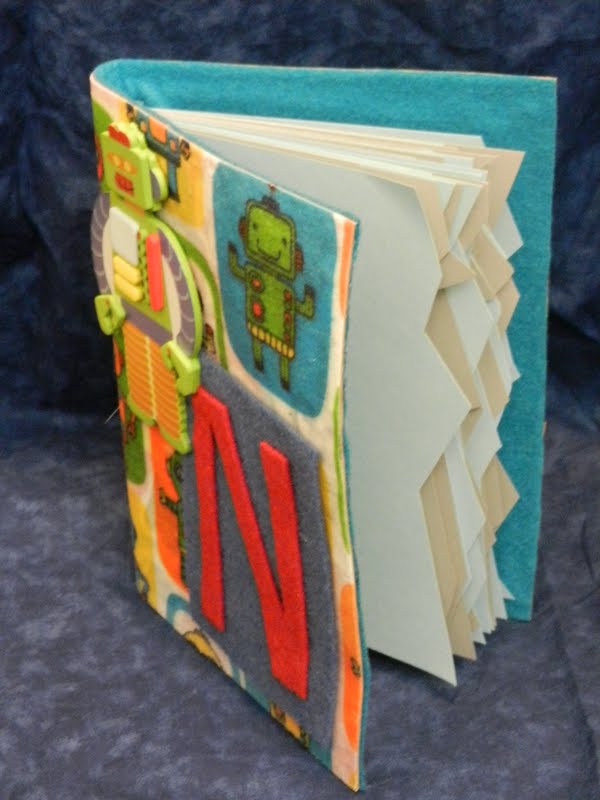
I had a lot of fun making a gift for a friend's son last week. It was his third birthday and he really likes robots. I made him a robot themed notebook because he is very creative and I thought it would be fun for his mommy to have something to save full of his masterpieces.
I'll share step by step instructions to make this project fun and easy.
Supplies:
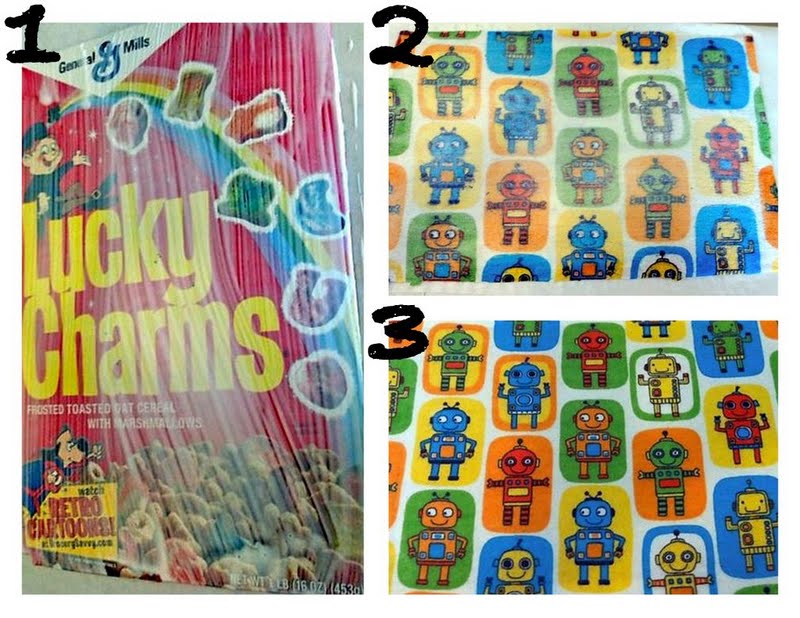
-piece of cardboard (this will be your journal cover so the piece should be large enough to be folded in half for a front and back cover (I used the front of a cereal box but keep in mind my journal is approximately half the size of a letter size notebook)
-fabric (enough to completely cover the front and back of your journal)
-Mod Podge
-hot glue gun (any other glue would probably work just fine but I LOVE my glue gun!)
-felt (enough to completely cover the inside cover of your journal)
-paper (enough to fill your journal)
-scissors
Optional:
-a friend with a cute kid having a birthday because this is the cutest birthday gift ever (obviously that's only my personal opinion)
1) Completely coat your cardboard with Mod Podge. Don't worry about the size for now, you will be trimming it later.
2) Press your fabric directly onto the coated cardboard (back of fabric is pressed down). Then give the top of your fabric a good coat of Mod Podge.
3) Let it dry (I left mine alone overnight but I'm sure it doesn't take that long to dry) and stare in awe of Mod Podge's mystical powers.
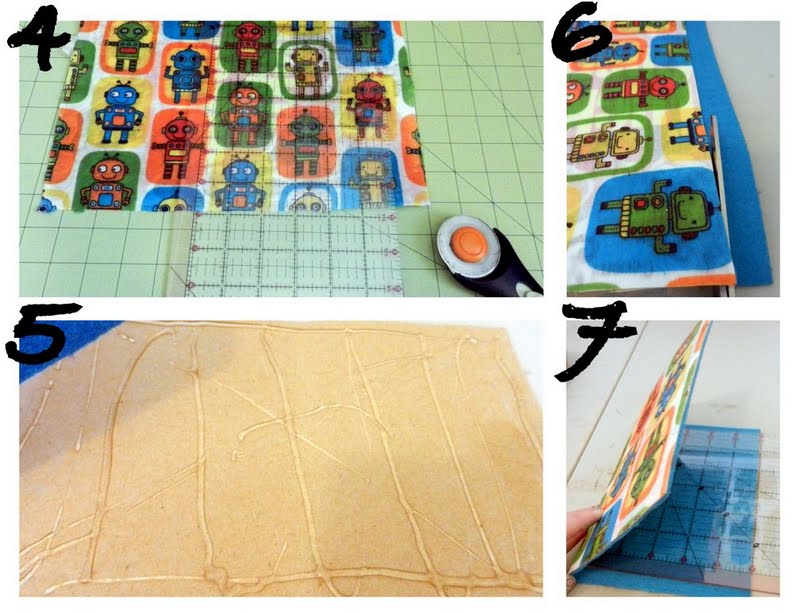
4) Trim your cover to your desired size. Remember that you will be folding the piece of cardboard in half to make the front and back cover. Don't cut two individual pieces to serve as the front and back.
5) Flip your pretty fabric covered cardboard over and cover it in hot glue (or your preferred glue).
6) Press a piece of felt onto the gluey (is that a word?) side of the cardboard. Trim off any excess felt.
7) Fold your cardboard to make your journal cover. The binding should be approximately one inch (depending on how much paper you plan to put in the book). Measure in from the outer edge so you remember to fold on the binding instead of directly in half. I found it to be pretty easy to fold using my rotary cutter guide to press the edge of my fold as a guide.
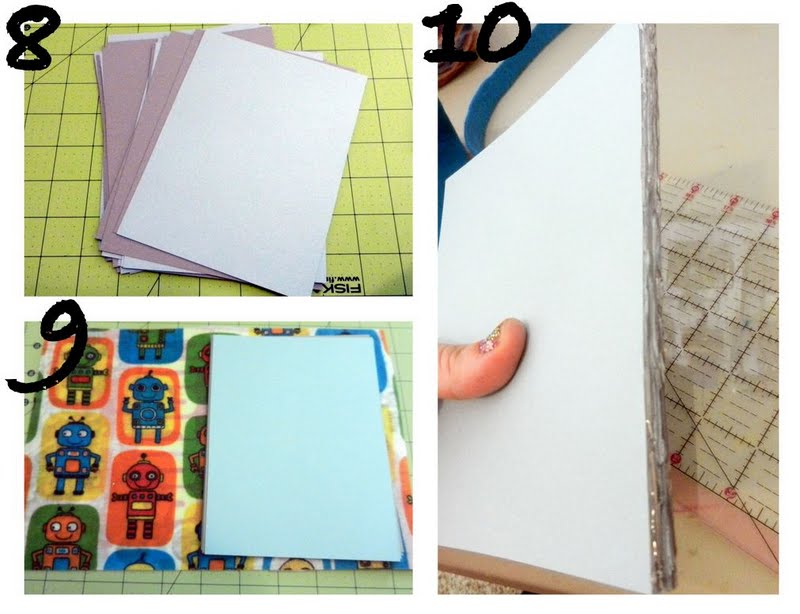
8) Pick out the paper you want to permanently glue into your journal.
9) Cut it to fit your journal. The dimensions are obviously dependent on the size of your cover. Just make sure your pages are slightly smaller than your cover so the paper edges don't meet the edges of the cover.
10) Generously apply hot glue to the binding of your pages (I was skeptical too but this actually holds all the paper together).
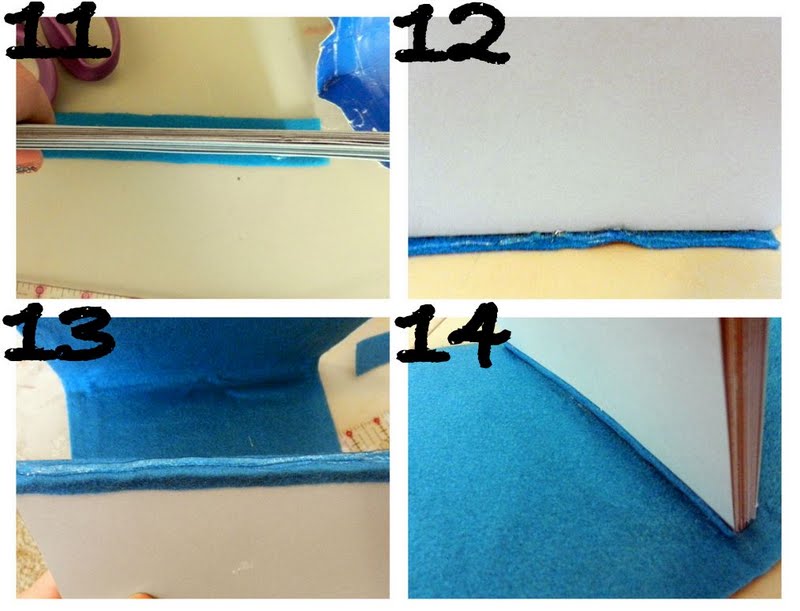
11) Apply more hot glue to the edge of the paper and push it onto a strip of felt. My felt was two inches wide but yours might end up being different depending on the overall size of your journal.
12) Use hot glue to attach the sides of the felt to the paper.
13) More hot glue! Generously apply it to the felt that reinforces your page binding.
14) Push your gluey (there's that silly word again) felt back into the book cover.
15) OPTIONAL - I chose to cut the edges of my paper because I wanted the journal to look interesting. Remember this was for a three year old's birthday gift.
16) Embellish the cover to make it fun. I used a wooden robot I had picked up from Joannes specifically for this project. I also glued on the birthday boy's initial (cut from scrap felt).

You're done! Now do what I did - wrap it up, sign a card, and run to the nearest post office to mail your belated birthday gift. That's an optional step too. You could always just look at your pretty new journal and smile thinking about all the wonderful things that will fill up the pages.
I'm linking this post HERE.


3 comments:
LOVE the robot journal. that is so neat. great ideas here.
im a new follower!
kathryn
www.thedragonsfairytail.blogspot.com
This is so cute. My boys would LOVE it.
I am a finalist in a huge room makeover giveaway. I would really appreciate it if you would take a moment and stop by and vote for me. I'm 3#. Thanks. Laura
http://vintagerevivals.blogspot.com/2011/05/top-5-plead-their-case.html
This is such a fun idea! Great tutorial too. THank you for linking!
Post a Comment