

The Project Runway patterns have good aspects and bad aspects.
GOOD: a lot of variety and on trend designs
BAD: complicated because there are so many options it is hard to follow the pattern
In my case it wasn't necessarily the pattern instructions that I found troubling, it was the sizing. I measured Elizabeth's chest and it was 19 inches which fell in the 1.5 size range which is about right because she is small and only 19 months old. Just to be safe I made the size 2. I finished the very complicated bodice. Sometimes patterns just do things weird. Like having me put the interfacing in in a complicated way or the way they word the pattern pieces. Anyways, I decided before I go any farther I was going to check it to make sure it fits. Well....it didn't. It was way too small. I know I measured correctly this time so that wasn't the problem. I think the pattern just isn't true to size which is the case in many patterns. That is the benefit of making your own pattern in a way. You know a shirt fits your model so when creating a pattern based on the shirt you know it will fit.
By this point I was not ready to try again and risk messing it up. So as I do so often, I improvised. I used the bottom half of the bodice and made it into an A-line shape. This was not going to be long enough but I will get back to that solution later. Next I cut a lining in the same shape. I sewed the shoulders of the lining and repeated with the main fabric together then I sewed the two together. I decided to stick with the pattern idea and not put in sleeves so I made flutter sleeves and inserted those. I created a placket on the back with a button loop to go over her head. (Easier than buttons all the way down or inserting a zipper).
Next for the bottom. I sewed up the sides of the bodice. Then I made a casing and sewed that to the bottom of the bodice. Then I pulled a 1/2 inch elastic through the casing using a safety pin. The last part I cut a large rectangle about 2 times the size of the bodice width. I hemmed the bottom of the rectangle and then I sewed the ends together making a long tube shape. On the top of the rectangle (opposite the hem side) I did a loose stitch all the way around. Then I pulled on the string of one end to scrunch it to the size of the casing. I attached the skirt to the casing and finished all my edges with a zig zag stitch.
Finally I have been wanting to try out this pleated bib that I saw on craftiness is not optional. To see the tutorial click here. So I made the bib but I flipped the pleats sideways for a different look, and sewed it to the front of the bodice. Finally I finished the neck with bias tape.

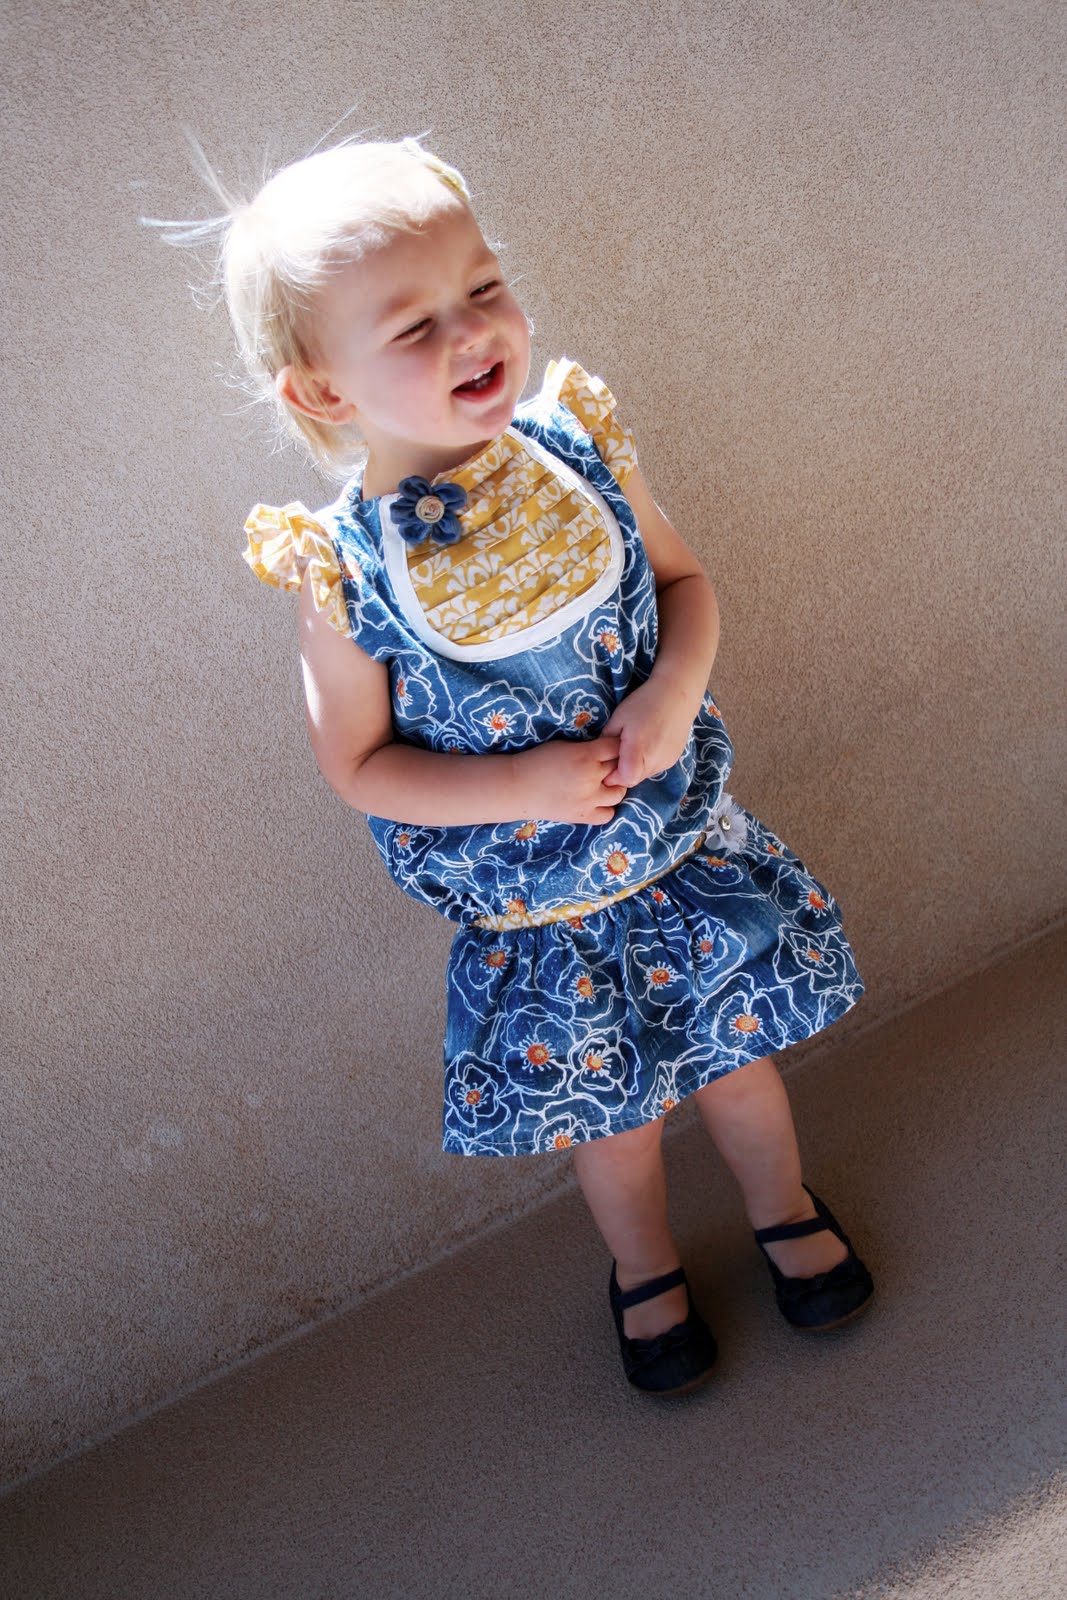

I LOVE IT. It is one of a kind. I added a few flowers just to add some pizazz and I am so happy it fits her and she loves how comfy it is.
3 comments:
I've had the same issues with Project Runway patterns. I get so excited because, as you said, they're so on trend, but they fit very very small. It's great that you saved your dress. The yellow pleats are super cute~
I love the yellow pleates on this dress! It came out great!
Sharon
So adorable!! Thanks for auditioning for American Crafter- good luck:)
Post a Comment